You will be shocked that these soft, chewy, and delicious dinner rolls are gluten free and vegan! Made with a custom gluten free flour blend and clever vegan swaps, these rolls are simple to make with just 1 hour of proofing time. They're the perfect dinner roll and are great as sliders too!

These Gluten Free and Vegan Dinner Rolls are soft, fluffy, and delicious! It may seem too good to be true, but yes you can make these at home. These dinner rolls are perfect for Thanksgiving and Christmas when you want a little bread on the side to soak up all the gravy. They would also make a delicious app with some garlic spread on top. Or turn them into sliders or mini sandwiches!
This dinner roll recipe features a custom gluten-free flour blend. It is very important to use the specified ingredients because everything is in there for a reason. Psyllium husk is a fiber source that forms a thick gel when mixed with water. In gluten free baked goods, it is a magical ingredient that almost mimics the properties of gluten, producing bouncy, elastic breads.
Traditional dinner rolls contain butter, eggs, and milk. These rolls are not only gluten free but vegan too! There are some clever swaps to make these allergy-friendly, but they truly do not taste lacking! Keep reading to learn how to make them.
Jump to:
Why You'll Love This Recipe
- This recipe is gluten free AND vegan for everyone to enjoy, regardless of dietary restriction.
- Enjoy gluten free soft and fluffy rolls that don't need to be toasted.
- Freezes well.
- They are naturally dairy-free and vegan.
- Let the stand mixer do the hard work for you.
- These dinner rolls are the perfect holiday side dish, appetizer, sandwich—you name it!
- No crazy ingredients and fillers.
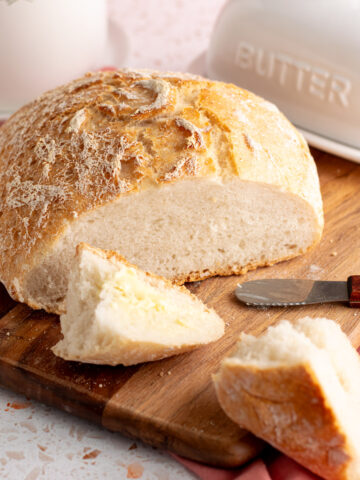
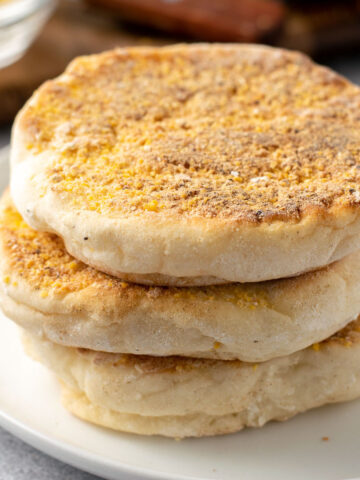
Want more gluten-free breads? You'll also like these homemade gluten-free bagels, gluten-free Detroit style pizza, gluten-free English muffins, gluten-free no knead bread, and gluten-free focaccia.
Ingredient Notes
Here are all the ingredients you'll need to make the ultimate gluten free vegan rolls:

- Instant yeast or active dry yeast—be sure to let it activate.
- Granulated sugar or honey. Honey is generally considered to not be vegan, but if you are just dairy free I recommend using it for flavor.
- Warm water: about 110ºF is good for yeast.
- Whole psyllium husk: This is a fiber source that is a really wonderful gluten replacement. If you have psyllium husk powder instead of whole, use 2 scant tbsp, since it is ground finer.
- Tapioca starch aka tapioca flour, or potato starch lightens up the other flours.
- Millet flour & sorghum flour: Gluten free flours with different properties and tastes that provide protein and structure to these rolls.
- Baking powder: Adds more softness and bounce to the rolls.
- Xanthan gum: Another binder commonly used in gluten free baked goods.
- Salt: Use a fine sea salt or kosher salt.
- Unsweetened applesauce: A great vegan replacement for eggs.
- Olive oil: Instead of butter in these rolls.
Which Gluten Free Flours to Use
These gluten-free rolls use a very specific blend of tapioca starch, millet flour, and sorghum flour. As you probably know, gluten free baking is a challenge and you must follow a recipe precisely for the best chance that it turns out well. Currently, the only ingredient swap I endorse is using potato starch instead of the tapioca starch. They are both very fine powders that act quite similarly. Please do not use a store-bought gluten free 1 to 1 flour blend. I have tried it in this recipe and my rolls did not turn out as fluffy and soft.
Another very important ingredient is psyllium husk, a fiber source that forms a thick gel when mixed with water. In gluten free baked goods, it is a magical ingredient that almost mimics the properties of gluten, producing bouncy, elastic breads.
Substitutions
While this recipe was developed with optimal ingredients, here are some substitution suggestions:
- Honey. You can use granulated sugar or honey to activate the yeast, depending on your dietary choices. If you are just dairy-free, try using honey as I love the flavor it gives. For vegan, use sugar.
- Whole psyllium husk vs psyllium husk powder. If you have psyllium husk powder instead of whole, use 2 scant tbsp, since it is ground finer.
- Flour. See above. I do not recommend changing any flours!
- This is a very specific recipe, so I do not recommend making any swaps!

Step-by-Step Instructions
Be sure to read the recipe card below for the full recipe.
(Prep) Grease an 8x8” pan with some olive oil or non-stick spray around the sides and on the bottom.
(1) In a small bowl, combine the yeast, sugar, and ½ cup warm water. Stir then set aside for 10 minutes to activate. If it does not foam and smell like yeast, start over.
(2) In another small bowl, stir together the psyllium husk and ⅔ cup warm water. Set aside to thicken for 10 minutes.

(3) In the bowl of a stand mixer, gently whisk together the tapioca starch, millet flour, sorghum flour, baking powder, xanthan gum, and salt.
(4) Make a well in the middle and pour in the olive oil, applesauce, yeast mixture, and psyllium gel mixture.
(5) Fix the stand mixer with the dough hook and mix on low speed until all the dry ingredients are incorporated. Then increase to medium speed for 2-3 minutes. You will have a sticky dough and it will not fully wrap around the hook.

Turn the dough out onto a floured surface. Use any of the gluten free flours. Flour your hands and divide the dough into 9 pieces of even weight, about 80g each. If the dough is too sticky to handle, you can refrigerate it for 1 hour to firm up.
Take a piece of dough and press it flat with your fingers. Pick up each of the edges towards the middle to form a ball, then flip it upside down and use both hands to gently turn and smooth the dough ball.
(6) Repeat with the remaining dough and place into the greased pan.
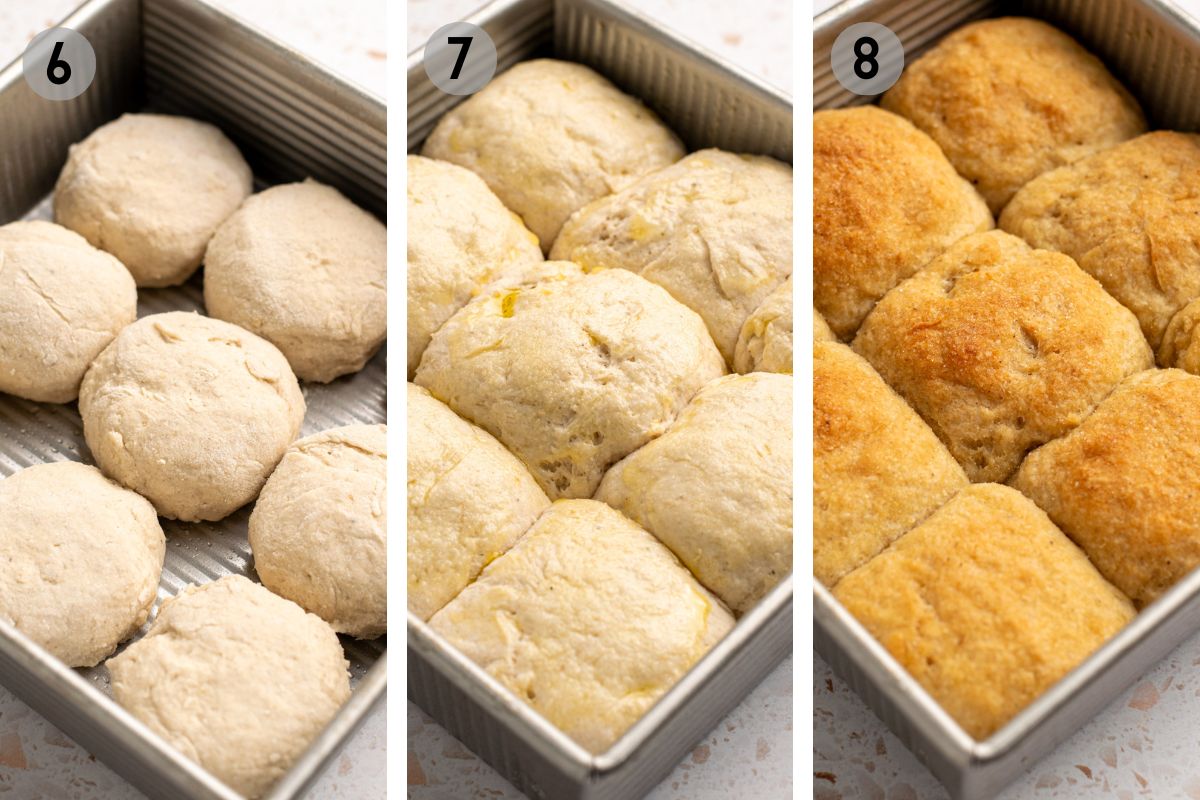
Cover the pan with plastic wrap or a kitchen towel and set in a warm place to let the dough rise for 1 - 1½ hours until doubled in size. In the winter, I like to preheat my oven to 100ºF then turn it off, creating a nice warm space. Ensure to move the rolls before you preheat the oven.
(7) Preheat the oven to 375ºF. Brush the tops of the rolls with olive oil and sprinkle with salt.
Bake uncovered for 22-25 minutes until the tops are golden brown.
(8) Remove from the oven and brush with a touch more olive oil. Allow to cool for at least 15 minutes. They are delicious when served warm, but the texture will benefit from cooling slightly. Enjoy with dairy-free butter, jam, or spreads.
What to Eat With Gluten Free Dinner Rolls
There are so many ways to enjoy your fresh gluten-free bread. It's delicious as an every day sandwich or a side to your holiday meal. Here are some suggestions:
- Plain. There's nothing better than fresh bread out of the oven. Let the rolls cool slightly and enjoy with some vegan butter or oil and vinegar.
- With your favourite spread. Cream cheese, nut butter, jam, etc! These rolls are fantastic toasted or un-toasted.
- As a sandwich. Fill with your favourite meats, cheese, or veggies and enjoy as a delicious gluten-free & vegan sandwich. Or better yet—mini sliders!
- Turn rolls into gluten-free garlic bread.
- Dip in your favorite soup. I like gluten-free minestrone, quinoa vegetable soup, or dairy-free broccoli cheddar soup.
- Serve with pasta such as sausage & eggplant pasta, spaghetti aglio e olio, or this authentic fettuccine alfredo.
- If you made your rolls a few days ago, turn stale bread into a gluten-free panzanella salad.
Make Ahead
I have not tested making the bread dough ahead of time. This recipe only requires one short rise. No need to let it rise a second time. It's best enjoyed on the day it's baked.
Storage
Once cooled, keep rolls in an airtight container at room temperature for up to 4 days. They will still be soft the next day! Reheat in the microwave to soften them.
Freezing: I recommend freezing rolls as soon as you can. Once cooled, separate the rolls and place in a freezer safe bag or container. Freeze for up to 3 months. Reheat in the microwave, oven, or air fryer until warmed throughout.

Expert Tips
Here are some of my top tips and tricks for successful gluten-free bread:
- Use the recommended gluten-free flours. I have tried this recipe several times with other flours and it does not turn out the same. Even the amazing Mulino Caputo Fioreglut was just not right for this recipe.
- If you have psyllium husk powder instead of whole, use 2 scant tbsp, since it is ground finer.
- Use a stand mixer ideally. The dough will be quite sticky by hand, but it's possible. If the dough is unmanageable, refrigerate it for an hour or so.
- Don't rush the rise. Stick to the recommended timing. Under or over proofing dough can lead to sub-optimal results.
- Let it cool for at least 15-30 minutes before slicing for best results. This allows the crumb to set and avoid a gummy bread. Don't worry, it will still be warm!
- Separate the rolls before freezing. Then you can thaw just as many slices as you need so the rest will stay fresh.
Frequently Asked Questions
No, it will not be the same! I have tried this recipe several times and this custom blend of flours is magical for this recipe. Unfortunately I have not tried a store-bought blend that has worked.
Psyllium husk is a fiber source that forms a thick gel when mixed with water. In gluten free baked goods, it is a magical ingredient that almost mimics the properties of gluten, producing bouncy, elastic breads.
This may occur because the yeast is expired, you haven't let it sit long enough, or your water was much too hot and killed the yeast. In this situation, I recommend you re-start with some fresh yeast, sugar, and warm (not hot) water to let it bloom again.
Baking powder serves 2 purposes in these rolls. It gives them an extra little boost of height and softness, plus it can help with browning in gluten free bread, which is otherwise quite pale.
Xanthan gum is a binder that is found in most gluten free baked goods. It mimics the properties of gluten that produce soft and elastic breads. Without it, many gluten free baked goods would crumble. You can find it easily online on Amazon or sometimes at health food stores.
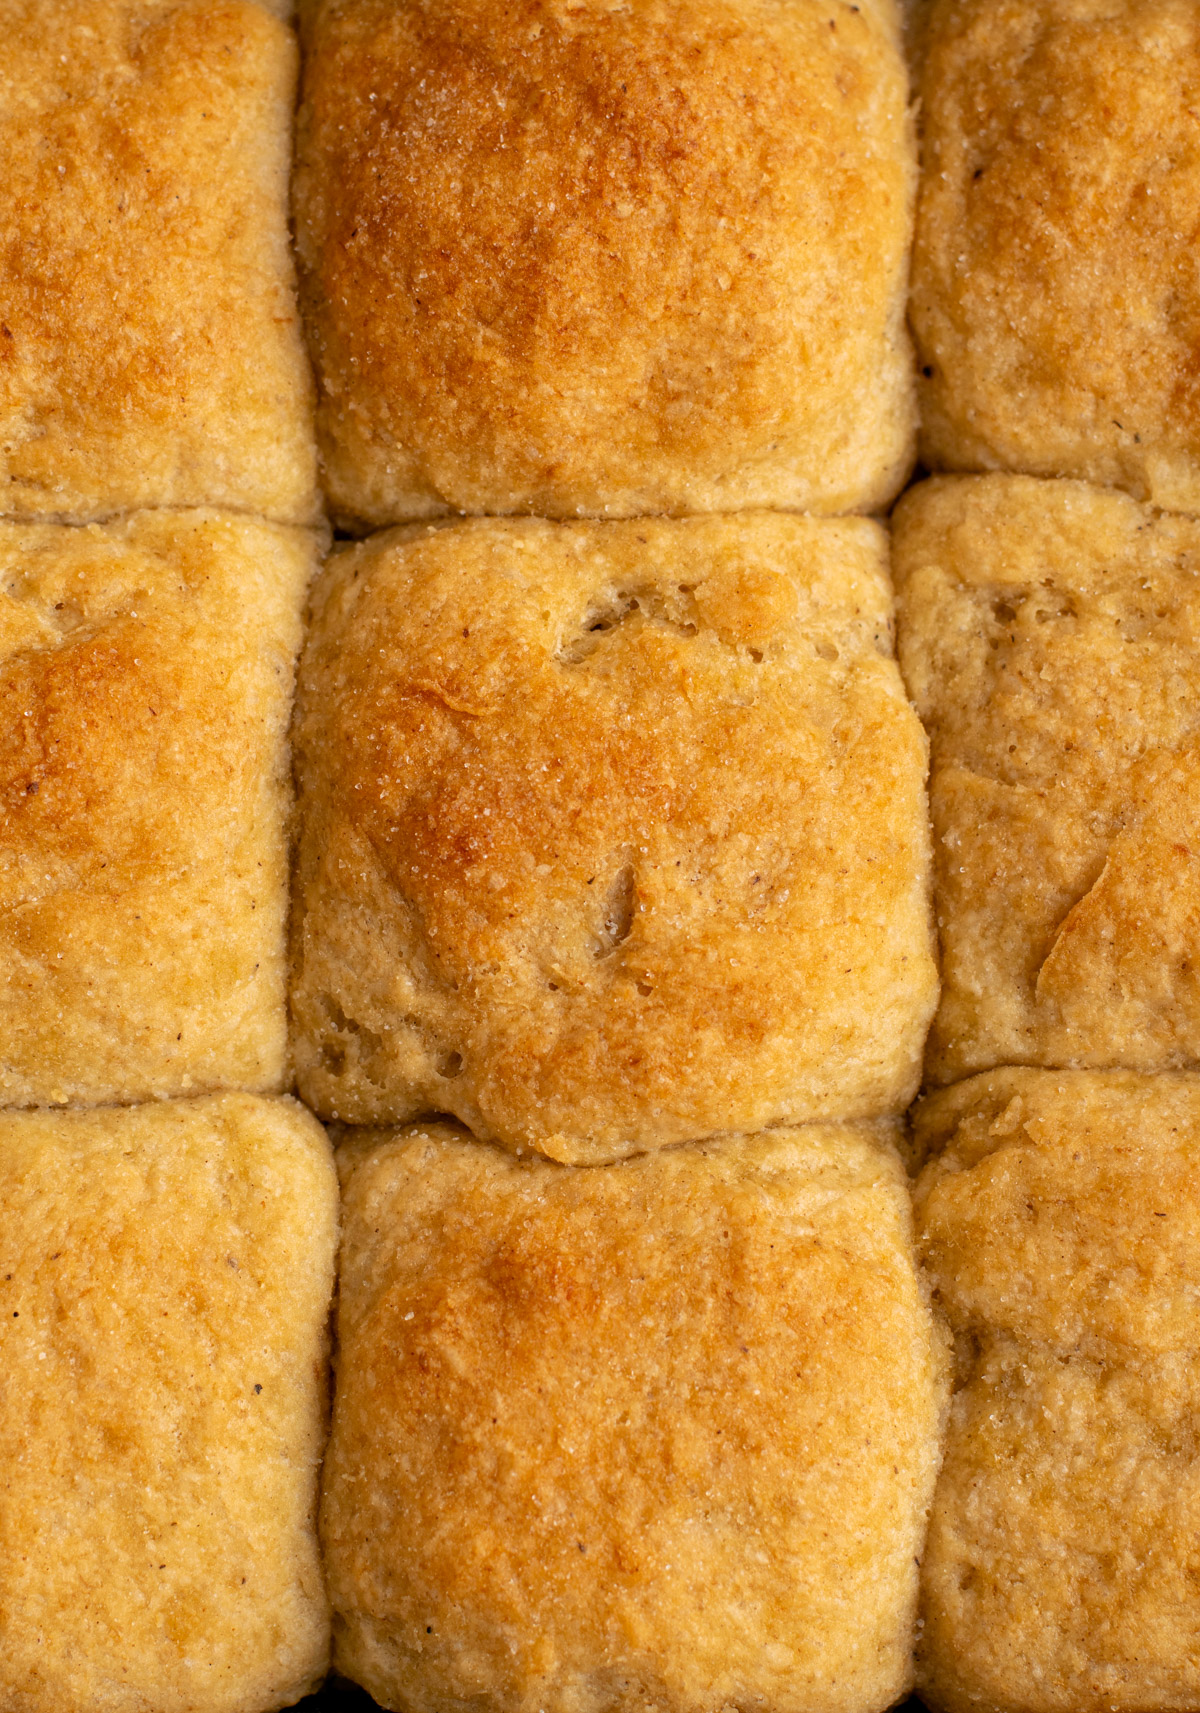
Finally enjoy soft and fluffy gluten free and vegan rolls! They are delicious all on their own, and of course when enjoyed with spreads and as sandwiches. It is worth the small task of blending gluten free flours to enjoy homemade bread. Everyone can enjoy these rolls, regardless of dietary restrictions.
More Gluten Free Bread Recipes
- Gluten Free No Knead Bread
- Gluten-Free Garlic Bread
- Homemade Gluten-Free English Muffins
- Gluten-Free Detroit Style Pizza

Have you made these gluten free and vegan rolls? I'd very much appreciate it if you leave a 5-star rating ⭐️⭐️⭐️⭐️⭐️ and review below, and tag me on instagram @fromoliviaskitchen!
Recipe

Gluten Free Vegan Dinner Rolls
Equipment
- Stand mixer fitted with the dough hook
Ingredients
For the Yeast
- 2¼ teaspoon instant yeast
- 2 tablespoon granulated sugar or honey
- ½ cup warm water
For the Psyllium Gel
- 2 tablespoon whole psyllium husk
- ⅔ cup warm water
For the Dough
- 1⅓ cup tapioca starch or potato starch
- ¾ cup millet flour
- ½ cup sorghum flour
- 2 teaspoon baking powder
- 2 teaspoon xanthan gum
- 1 teaspoon salt
- ⅓ cup unsweetened applesauce
- 2 tablespoon olive oil
For Topping
- 2 tablespoon olive oil
- ½ teaspoon salt
Instructions
- Grease an 8x8” pan with some olive oil or non-stick spray around the sides and on the bottom.
- In a small bowl, combine the yeast, sugar, and ½ cup warm water. Stir then set aside for 10 minutes to activate. If it does not foam and smell like yeast, start over.
- In another small bowl, stir together the psyllium husk and ⅔ cup warm water. Set aside to thicken for 10 minutes.
- In the bowl of a stand mixer, gently whisk together the tapioca starch, millet flour, sorghum flour, baking powder, xanthan gum, and salt. Make a well in the middle and pour in the olive oil, applesauce, yeast mixture, and psyllium gel mixture.
- Fix the stand mixer with the dough hook and mix on low speed until all the dry ingredients are incorporated. Then increase to medium speed for 2-3 minutes. The dough will be very sticky and will not fully wrap around the hook.
- Turn the dough out onto a floured surface. Use any of the gluten free flours. Flour your hands and divide the dough into 9 pieces of even weight, about 80g each. If the dough is too sticky to handle, you can refrigerate it for 1 hour to firm up.
- Take a piece of dough and press it flat with your fingers. Pick up each of the edges towards the middle to form a ball, then flip it upside down and use both hands to gently turn and smooth the dough ball.
- Repeat with the remaining dough and place into the greased pan.
- Cover the pan with plastic wrap or a kitchen towel and set in a warm place to proof for 1 - 1½ hours until doubled in size. In the winter, I like to preheat my oven to 100ºF then turn it off, creating a nice warm space. Ensure to move the rolls before you preheat the oven.
- Preheat the oven to 375ºF. Brush the tops of the rolls with olive oil and sprinkle with salt.
- Bake uncovered for 22-25 minutes until the tops are golden.
- Remove from the oven and brush with a touch more olive oil. Allow to cool for at least 15 minutes. They are delicious when served warm, but the texture will benefit from cooling slightly. Enjoy with dairy-free butter, jam, or spreads.
Notes
- Sugar vs honey: Honey is not considered vegan by many, but if you are just dairy-free, I like the flavor honey adds.
- Whole psyllium husk vs psyllium husk powder: If you have psyllium husk powder instead of whole, use 2 scant tbsp, since it is ground finer.
- Can I use a gluten free 1:1 all purpose flour blend? No, it will not be the same! I have tried this recipe several times and this custom blend of flours is magical for this recipe. Unfortunately I have not tried a store-bought blend that has worked.
- If you don't have a stand mixer, you can mix by hand.
- How to serve dinner rolls: As a side with a holiday meal, with your favorite jam or spread, with butter, as mini sandwiches, or as slider burgers.
- Storage: Once cooled, keep rolls in an airtight container at room temperature for up to 4 days. Reheat in the microwave to soften them.
- Freezing: I recommend freezing rolls as soon as you can. Once cooled, separate the rolls and place in a freezer safe bag or container. Freeze for up to 3 months. Reheat in the microwave, oven, or air fryer until warmed throughout.
Anara says
Hi! I have made those rolls today. I had one slightly different ingredient sprouted finger millet flour. The rolls are very yummy and I liked the texture.
Thank you for sharing your recipe!
🙏