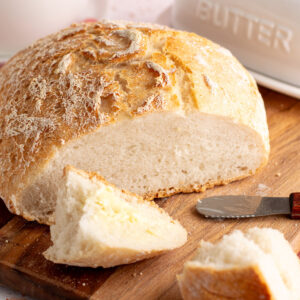
This gluten-free artisan bread is a miracle! It's soft, squishy, and doesn't require toasting. This recipe uses just 5 ingredients, no kneading, and is made from start to finish within 3 hours. Enjoy as a sandwich, toast, or just on its own. This bread is also dairy-free and vegan.

Finding good bread is one of the biggest challenges when you're gluten free. Supermarket loaves cost $8-12 and are often dry, crumbly, and flavorless. Homemade gluten free yeast bread often calls for a million different flours, mixes like cake batter, and is difficult to bake. Plus, nearly all of them need to be toasted in order to not fall apart.
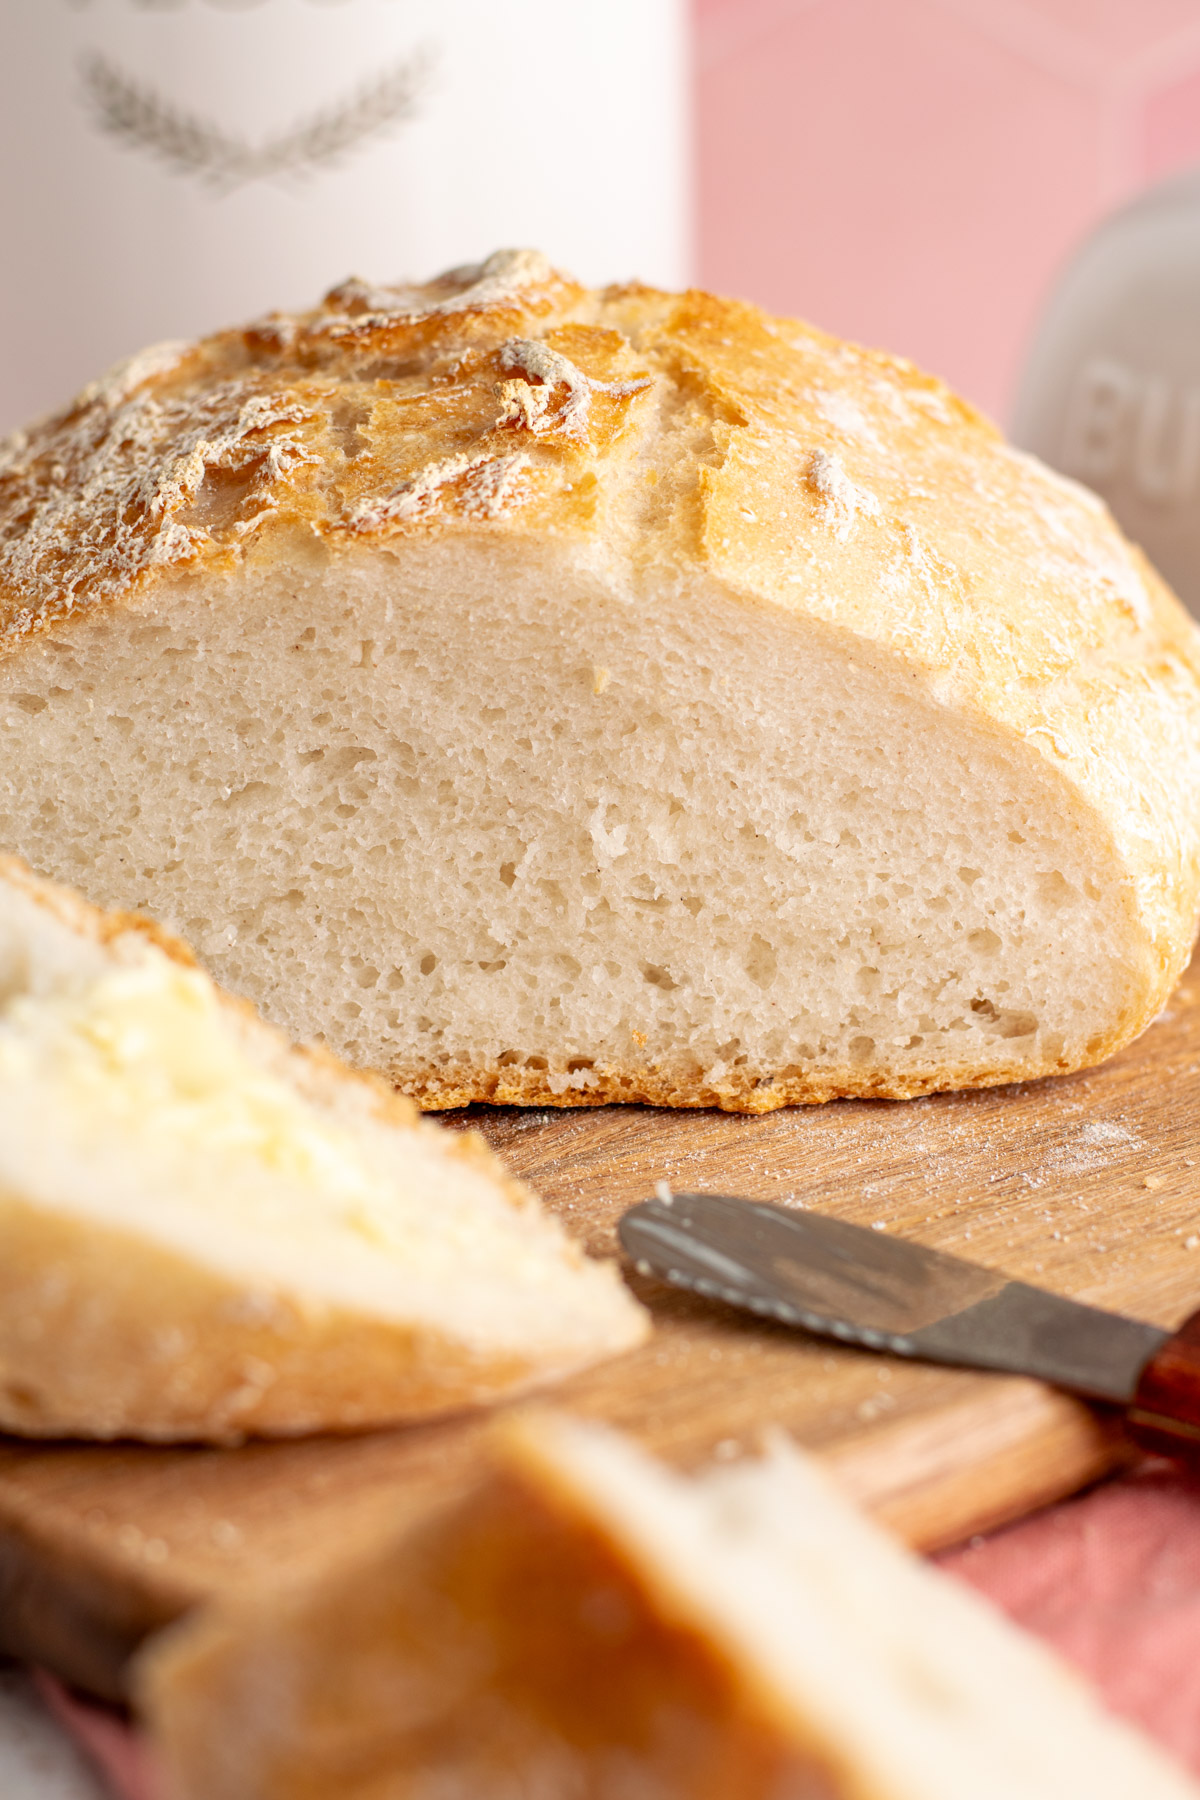
This Gluten Free No Knead Bread recipe is none of that! This easy & simple homemade gluten-free artisan bread is made with just 5 ingredients and no special equipment. You don't need a mixer, nor do you need to knead the dough! It is soft, bouncy, squishy, and doesn't need to be toasted to be delicious!
The magic is all in the flour here. This crusty bread is best enjoyed in a sandwich, toasted with jam, or simply on its own with butter! Yes, you can enjoy fresh un-toasted gluten-free bread with butter! Keep reading to learn just how magical it is! This will be the best gluten-free bread recipe you've ever had.
Jump to:
Why You'll Love This Recipe
- Enjoy soft and sturdy un-toasted gluten-free bread.
- Just 5 ingredients. No need for the usual gluten-free blend of tapioca starch, sorghum flour, potato starch, brown rice flour, psyllium husk, etc.
- 5 minutes of hands on prep.
- No fancy mixers or equipment needed. No loaf pan either, unlike most GF bread recipes.
- Freezes well.
- It is naturally dairy-free and easily vegan.
- No crazy ingredients and fillers.
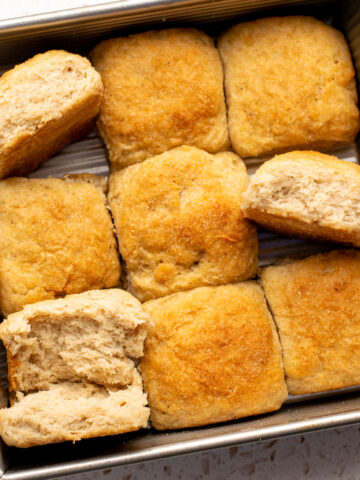
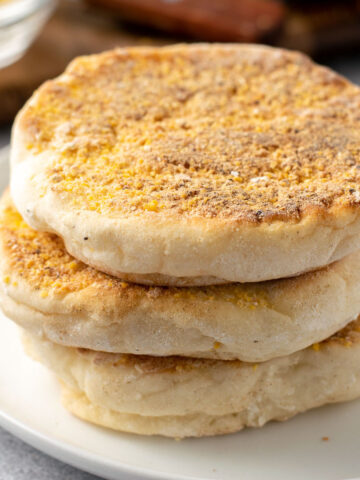
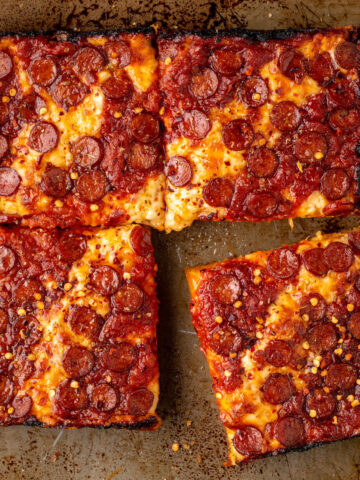
Want more gluten-free breads? You'll also like these homemade gluten-free bagels, gluten-free Detroit style pizza, gluten-free English muffins, and gluten-free focaccia.
Ingredient Notes
Here are all the ingredients you'll need to make the ultimate gluten free bread:

- Water: 110ºF is generally a good temperature for yeast.
- Instant yeast
- Honey or granulated sugar
- Caputo Fioreglut gluten-free flour: The only flour that I recommend for this recipe is the Mulino Caputo Fioreglut gluten-free flour. See the below section on flour to learn why it's so unique and important.
- Fine sea salt
Which Gluten Free Flour to Use
Please note that the only flour I recommend for this recipe is the Mulino Caputo Fioreglut gluten-free flour. This flour is absolutely incredible for gluten-free yeasted doughs and breads because it contains gluten-free wheat starch which gives it amazing elasticity and workability. Yes, it is safe for celiacs. To learn more about gluten-free wheat starch, read this informative article from Wheat by the Wayside.
Unfortunately, it can be expensive and hard to find. Amazon carries it for $30 CAD per bag (1 kg), which is INSANE! No one should be paying that but unfortunately, it is the most accessible option. I purchase mine at local Italian stores, where a good price is $12 CAD a bag (1 kg). It is imported from Italy so those will be your best bet. Call around!
Note that I have not tested this recipe with any other flour, so unfortunately at this time I do not have another flour substitution. I do not recommend a 1:1 flour with xanthan gum as they tend to work poorly with yeast. I hope to develop my own blend that is comparable soon!
Substitutions
While this recipe was developed with optimal ingredients, here are some substitution suggestions:
- Vegan. This recipe is naturally dairy-free. For vegan bread, simply use granulated sugar instead of honey.
- Flour. As mentioned in the section below, the only flour that I can recommend for this recipe is the Mulino Caputo Fioreglut gluten-free flour. It contains gluten-free wheat starch (safe for celiacs), and gives results unlike any other flour.
Step-by-Step Instructions
Be sure to read the recipe card below for the full recipe.
(1) In a large bowl, whisk together the wet ingredients: warm water, yeast, and honey or cane sugar. Let it sit for 10 minutes. It should appear foamy across the top.
(2) Stir half the flour and salt into the yeast mixture with a fork or wooden spoon, it will be quite sticky. Add the rest of the dry ingredients as needed until the dough pulls away from the edges of the bowl and is fairly dry.
(3) Cover the bowl with plastic wrap or a kitchen towel and leave it in a warm place to let the dough rise for 1½ hours. In cold weather, it may take closer to 2 hours for the dough to double in size.

Just before the dough is ready, preheat a dutch oven with the lid at 450ºF for 20-30 minutes.
(4) Use a dough scraper or spoon to gently plop the dough onto a square of parchment paper.
(5) Remove the dutch oven and hold the parchment paper to carefully lower the dough inside. Place the lid back on and bake for 30 minutes covered.
(6) Remove the lid for the last 10-15 minutes, until the dough is your preferred shade of golden brown.
Once baked, use the parchment paper to carefully lift the dough out and onto a wire rack. Slide off the parchment paper and discard.
Let the bread cool for at least 30 minutes before slicing, but ideally 2 hours until it has fully come to room temperature. Slice with a serrated knife and enjoy with butter, toast, sandwiches, etc!

What to Eat With Gluten Free Artisan Bread
There are so many ways to enjoy your fresh gluten-free bread. Here are some suggestions:
- Plain. There's nothing better than fresh bread out of the oven. Let the loaf cool slightly and enjoy with some butter or oil and vinegar.
- With your favourite spread. Cream cheese, nut butter, jam, etc! This bread is fantastic toasted or un-toasted.
- As a sandwich. Fill with your favourite meats, cheese, or veggies and enjoy as a delicious and large gluten-free sandwich.
- Turn the slices into gluten-free garlic bread.
- Dip in your favorite soup. I like gluten-free minestrone or dairy-free broccoli cheddar soup.
- Serve with pasta such as sausage & eggplant pasta or this authentic fettuccine alfredo.
- If you made your loaf a few days ago, turn stale bread into a gluten-free panzanella salad.
- Turn day-old bread into croutons. Slice into bite-sized pieces, toss in some olive oil, and bake at 400ºF on a wire rack over a baking sheet for 5-10 minutes. Your oven may require more or less time. Bake until they are crispy and delicious. Use in salads or soups!
Make Ahead
I have not tested making the bread dough ahead of time. This recipe only requires one 90 minute rise, which is fairly easy to fit into your schedule. No need to let it rise a second time. It's best enjoyed on the day it's baked.
Storage
Slice the bread with a serrated knife as you need it, and store in an airtight container or ziploc bag. It will be freshest for 2 days. Slice any leftover bread and freeze for up to 3 months. Defrost on the counter and toast lightly before using.

Expert Tips
Here are some of my top tips and tricks for successful gluten-free bread:
- Use the recommended gluten-free flour. Mulino Caputo Fioreglut is a very unique flour that is gluten-free, yet contains wheat starch. It has amazing elasticity and kneading properties. I find it on Amazon and at local Italian markets. I cannot speak for results when a flour other than this is used.
- Don't rush the rise. Stick to the recommended timing. Under or over proofing dough can lead to sub-optimal results.
- Let it cool for at least 30 minutes before slicing for best results. This allows the crumb to set and avoid a gummy bread. Don't worry, it will still be warm to try after 30 minutes of cooling!
- Slice the bread before freezing. Then you can thaw just as many slices as you need so the rest will stay fresh.
Frequently Asked Questions
I recommend using Mulino Caputo Fioreglut gluten-free flour. It is actually wheat starch with the gluten removed (and yes it is celiac-safe). This allows it to produce wonderful breads, very reminiscent of the properties of gluten. It is very special and I do not recommend using any other flour. Find it at local Italian markets or on Amazon.
Your yeast may not foam for 2 reasons: 1) You are using instant yeast. There will be less of a reaction from this type of yeast, but it should bubble a bit. 2) Your yeast is dead. This may occur because the yeast is expired, you haven't let it sit long enough, or your water was much too hot and killed the yeast. In this situation, I recommend you re-start with some fresh yeast, sugar, and warm (not hot) water to let it bloom again.
This is not necessary for this no knead bread. Kneading is a technique used to build up gluten in dough to make it more elastic. Since this bread is gluten-free, there is no point in kneading this dough.
This is not necessary for this recipe. This bread was designed to be as simple as possible, so scoring is not necessary, and in fact, the dough is probably a bit too sticky to score.
No, unfortunately the only flour recommended is the Caputo Fioreglut flour, not any other gluten-free flour blend. The gluten-free wheat starch that it contains is very important for the elasticity of the dough.
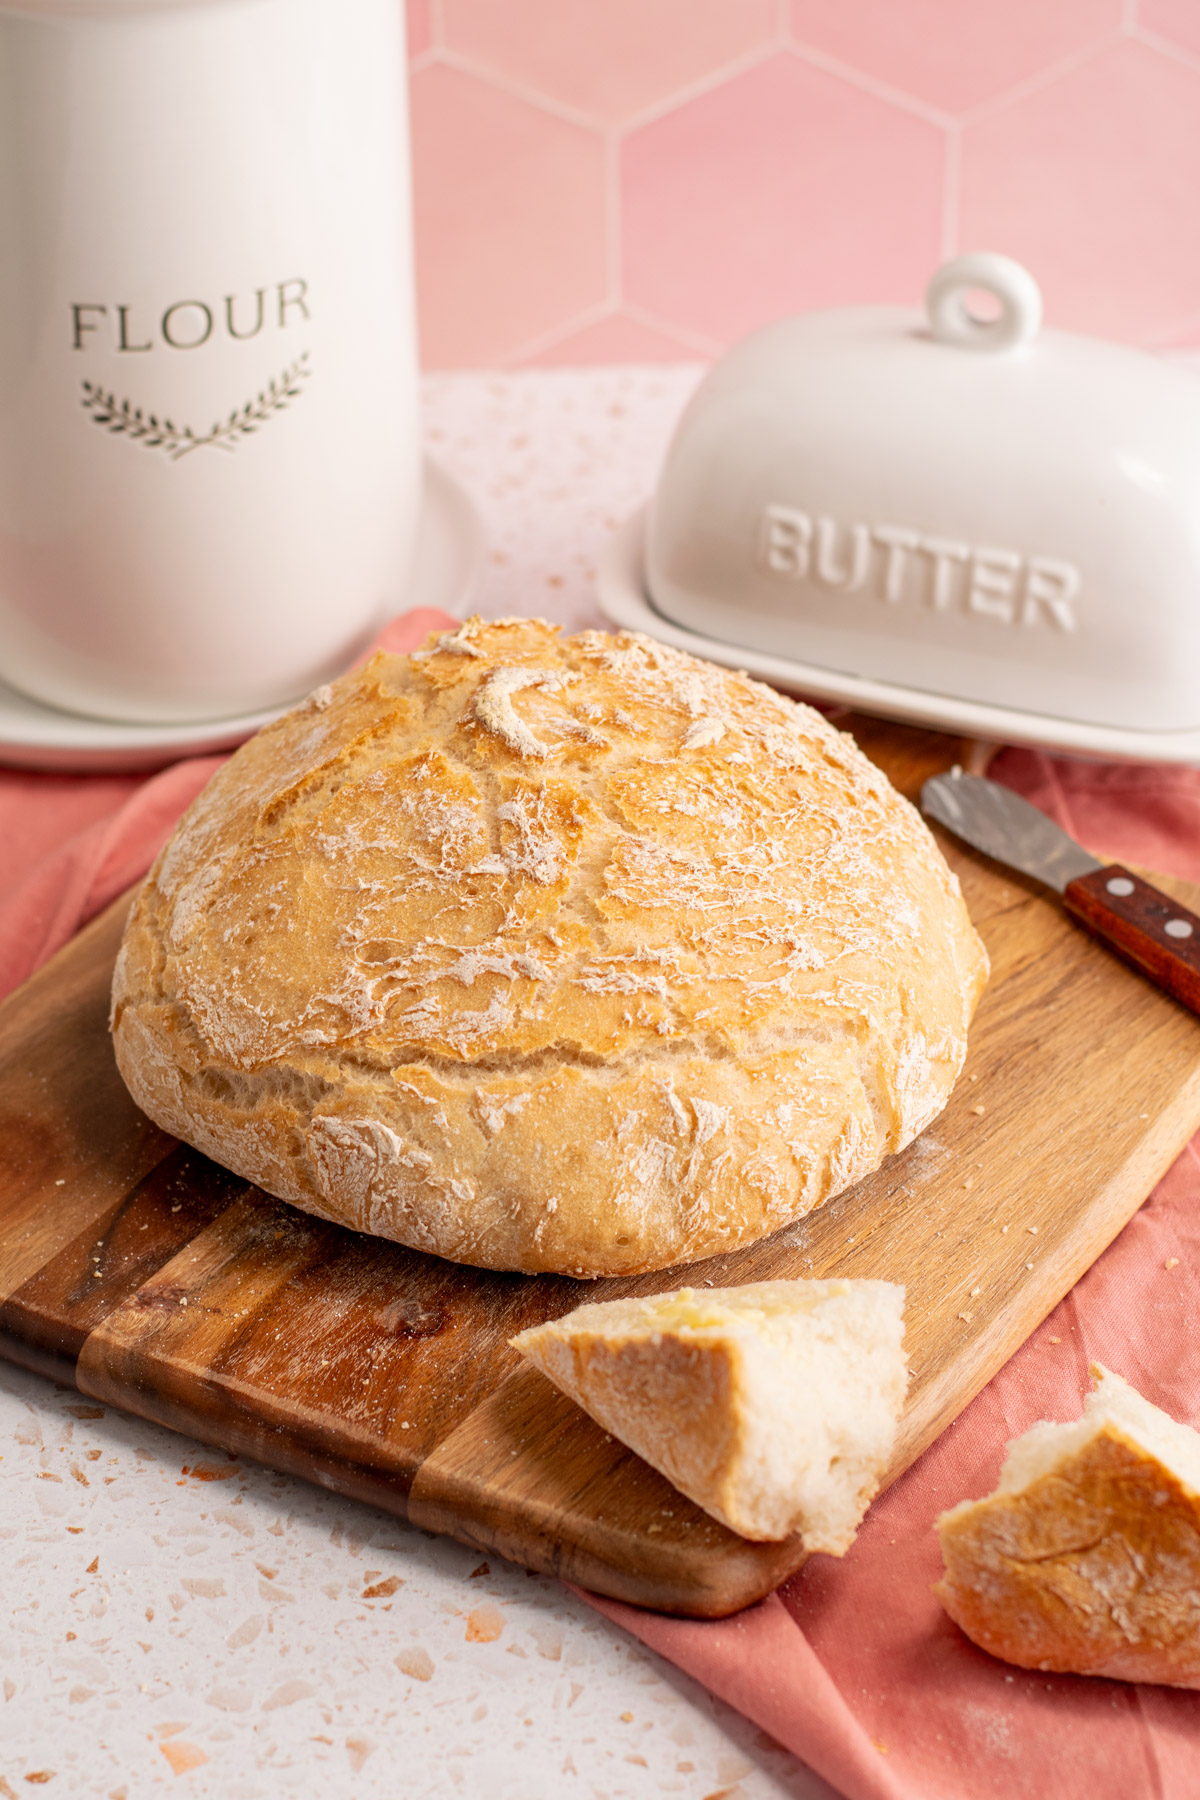
Finally enjoy soft, fluffy, crusty gluten free artisan bread at home! This easy no knead recipe comes together quickly with minimal ingredients. It is delicious all on its own, and of course when enjoyed with spreads and sandwiches. It is worth the task of finding the Caputo Fioreglut flour to enjoy homemade bread. This is a special recipe!
More Gluten Free Bread Recipes
- Gluten Free Vegan Dinner Rolls
- Gluten-Free Garlic Bread
- Homemade Gluten-Free English Muffins
- Gluten-Free Detroit Style Pizza

Have you made gluten free no knead bread? I'd very much appreciate it if you leave a 5-star ⭐️⭐️⭐️⭐️⭐️ review below, and tag me on instagram @fromoliviaskitchen!
Recipe
Gluten Free No Knead Bread
Equipment
- Cast iron dutch oven
Ingredients
- 1¾ cups warm water 410g, 110ºF is generally a good temperature for yeast.
- 2¼ teaspoon instant yeast 8g
- 1 teaspoon honey or granulated sugar 7g
- 3 cups caputo fioreglut gluten-free flour 475g
- 2½ teaspoon fine sea salt 10g
Instructions
- In a large bowl, whisk together the warm water, yeast, and honey. Let it sit for 10 minutes. It should appear foamy across the top.
- Stir in the half the flour and salt with a fork, it will be quite sticky. Add the rest of the flour as needed until the dough pulls away from the edges of the bowl and is fairly dry.
- Cover the bowl with a kitchen towel and leave it in a warm place to rise for 1½ hours. In cold weather, it may take closer to 2 hours for the dough to double in size.
- Just before the dough is ready, preheat a dutch oven with the lid at 450ºF for 20-30 minutes.
- Use a dough scraper or spoon to gently plop the dough onto a square of parchment paper. Remove the dutch oven and hold the parchment paper to carefully lower the dough inside. Place the lid back on and bake for 30 minutes covered, then remove the lid for the last 10-15 minutes, until the dough is your preferred shade of golden brown.
- Once baked, use the parchment paper to carefully lift the dough out and onto a wire rack. Slide off the parchment paper and discard.
- Allow the loaf to cool for at least 30 minutes before slicing, but ideally 2 hours until it has fully come to room temperature. Slice with a serrated knife and enjoy with butter, toast, sandwiches, etc!
Notes
- Flour: The only flour recommended for this recipe is Mulino Caputo Fioreglut gluten-free flour. Try to find it at a local Italian store, or Amazon.
- Dairy-Free & vegan: This artisan bread is naturally dairy-free. Make it vegan too by using granulated sugar instead of honey.
- Storage: Slice the bread with a serrated knife as you need it, and store in an airtight container or ziploc bag. It will be freshest for 2 days. Slice any leftover bread and freeze for up to 3 months. Defrost on the counter and toast lightly before using.
Jayde says
This was easily the best bread I’ve had since my celiac diagnosis! I used an oiled cast iron pan (bc that’s what I had) instead of a Dutch oven and forgot about the parchment paper and… the bread, or what’s left of it, is truly phenomenal! You should for sure make it if you love bread. I’m already dreaming about sourdough options. Notes: I let it rise for about 2.5 hours as it hadn’t risen much after 1. I halved the recipe and made a small loaf. The flour cost $22 (CAD) for a bag at my local Italian grocery.
Olivia Parsons says
I'm so glad you enjoyed this bread Jayde! It is truly magical. It hurts that the flour cost $22 at your store.. I've seen it at that price before, but $15 seems to be the going price I see at some little Italian markets recently. Enjoy!
Muriel says
Hello, What size cast iron do I need to buy for the 1x recipe please? I can’t wait to make this bread; I have no idea what size to buy. Thank you so much.
Olivia Parsons says
I believe mine is a 5 quart dutch oven. An oven safe pot with lid will work. 5 or 6 quarts.
Constance says
Would a 4.3 - quart dutch oven work?
Olivia Parsons says
I think that's the smallest I'd go! It should work but it could limit the growth of the loaf.
Ani says
I really excited to see this until I realized that I'd have to use $9 worth of flour to make it. Sad
Olivia Parsons says
I know, it's expensive but it truly is the best GF flour.
Penny says
Amazon has it for $17 for a 2.2 bag.
Yvonne says
The bread tastes delicious! Unfortunately the top of my bread did not brown. Any advice?
Olivia Parsons says
I'm glad you enjoyed! Unfortunately gluten free bread often does not brown very deep. Try moving the bread to a higher rack for the last 10-15 minutes of cooking, or give it a quick broil if you want slightly more colour.
Michelle says
After 30 minutes of baking, after I took the lid off my Dutch oven, I brushed the top with EVOO. The bread crust browned perfectly on top (that thick, tough European styled crust). The crumb was still very tender.
Ana says
Can I make this in a loaf pan?
Olivia Parsons says
Hi Ana! I haven't tried this. Baking time may differ.
Michelle says
Yes. I have used 2 metal, nonstick bread pans for this recipe. I set them inside a roaster in the oven. Lovely results.
Chelsea says
Have you halved the recipe before? I don’t eat a lot of bread and don’t want it to go to waste.
Olivia Parsons says
I haven't, but it should work! I recommend making the full recipe, slicing it up when cooled, and freezing in a ziplock bag. Toast the fresh bread whenever you need it!
Tracy says
I also was wondering about a half recipe, did you try it? Is the baking time the same or do you reduce? I'd rather have a small fresh loaf because I am baking for 1 🙂
Chelsea says
For the nutrition facts, is the serving size one slice of bread?
Olivia Parsons says
Yes, and I get about 10 slices per loaf.
Tracy says
WOW, finally an easy bread recipe that isn't a dense brick! This flour is amazing, thank you for sharing your recipe.
Olivia Parsons says
SO happy you enjoy!
Joy says
Have you ever tried adding herbs or adding cinnamon & raisins? Wondering if i could do that..
Trish says
My husband is newly gluten free and I love cooking. I have been struggling with this decision only because I felt like I wasn’t going to be able to make things he loves. He told me yesterday he missed my bread so I went looking. This bread was delicious and I hate gf bread! My daughter happened to be here and said she could not tell the difference! This is a woman that can tell me the difference between brands of spring water!
Olivia Parsons says
I'm so glad you enjoyed, Trish! If you search Caputo on my site you'll find some more recipes using the incredible flour!
Teri J says
Have you tried using the Caputo yeast instead? This yeast says you don't have to dissolve in water first, so wondering if you've tried it. I have for GF focaccia bread and it works beautifully, but unsure on this recipe.
Olivia Parsons says
I haven't used that yeast. I like to mix the yeast and water first to ensure it is fresh and active. You can use that and still follow the instructions here.
Teri J says
I made this last night for my BFF who is Celiac and it turned out amazingly well. I did use the Caputo yeast, which does not require activating it in water and all was fabulous. Just added all the ingredients directly to the Caputo flour and viola...perfect GF artisan bread. It was delicious alongside our Paella.
Sandy Montgomery says
I am excited to try this recipe, my husband is celiac and wants some good bread. Do I have to use a cast iron pan?
Olivia Parsons says
It can be any pot with lid that is oven safe! Alternatively you should be able to bake it on a baking steel or a pan, but I have not fully tested this method yet.
Sandi DeFalco says
Hi Olivia! I viewed the flour online at different vendors but none of them show an ingredient label. I need to know if soy flour is in this because I can’t have soy.
Olivia Parsons says
Hi Sandi, you can see a photo of the ingredients on the package in the Gluten Free Detroit Style Pizza post. Search on the site here!
Sandi DeFalco says
Yay, no soy! I just ordered from Amazon (USA) for $17.95
Dee says
I have tried this recipe 2 times and it did not rise. I was using a regular pot with a lid as per one of the comments stating it can be used. Any ideas why it didn't rise?
Olivia Parsons says
Sorry to hear that! I sounds like your yeast is not fresh if rising is the issue. Check that your yeast is not expired, and rise in a warm place. It may take longer than stated. I like to preheat my oven to 100ºF then turn it off, and place the bread to proof in there. Also ensure your water is not too hot or it will the yeast. It should just be warm to the †ouch. Please use all ingredients as specified.
Daniela Neffgen says
It’s been my mission for years to find a good GF bread recipe. I made this for the first time last weekend and have made it again this weekend. You would never know this bread was GF. Soft and fluffy with the best crunchy crust. So good!
Olivia Parsons says
I'm thrilled to hear you enjoy! Thank you for the kind review.
KATHY JAMES says
Bread inside was wonderful. However the crust was so hard I could hardly cut or chew it. How can I fix this?
Olivia Parsons says
It shouldn't be that hard! Try preheating your dutch oven for less time, and add a few ice cubes to the dutch oven when you add the bread to steam and soften the crust.
Teri Peterson says
I found if I only do 10 minutes with the cover off instead of 15, that the crust isn’t as hard to cut through.
Marty says
This is the best gluten free bread
I have ever eaten. Crusty on the outside and soft on the inside. It turns out every time. I slice it and freeze it so I can have some ever
day. I have been gluten free for 15
years. Thank you! A winner in my book.
Olivia Parsons says
This is the best!!!! Thank you and I'm so happy you enjoy.
Dianne Wilke says
Can another flour be used? I make my own flour blend & have used it for years with success. What makes Cuputo flour special?
Olivia Parsons says
No other flour can be used, that I've tried. Caputo contains gluten free wheat starch which is key in the elasticity of the bread.
Kathleen says
Followed the recipe exactly and my bread was not fully cooked through. Any suggestions?
Olivia Parsons says
Did you use a dutch oven? The correct amount of water? Maybe your oven was not hot enough.
Lori says
This bread just came out of the oven, smells heavenly and looks prettier than my crusty French bread I used to make! I'm waiting for it to cool so I haven't tasted it yet but if it tastes as good as it smells, WOW!
Courtney says
How big is your Dutch oven? Can’t wait to try!
Olivia Parsons says
I believe mine is about 5-6 quarts.
Jules says
Hi, I’m a big fan of Caputo fioreglut flour and I’ve had excellent rolls, but I don’t have a Dutch oven or larger casserole dish, is there another way to cook this yummy looking bread ?
Many thanks
Alice says
I have been GF for 25 years, my husband for about 3 years (he's gluten intolerant due to IBS, not celiac). He especially misses bread. This recipe is my 7th one I have tried and it is an absolute hit with him! My one issue is I'd like to make the loaf "taller" so the slices are a better size for sandwiches. My dough was a little soft (as expected) when going into my 5 quart Dutch oven. Should I try a smaller Dutch oven/pan to contain the dough into the desired shape? What about the Pullman style pan that works for other GF breads (some come with lids, so that might help it steam)? Thanks for any advice. This is definitely a keeper!!
I'd also like to share that I used ceramic pie weights in a single layer under the parchment paper and dough when baking the bread. I heated them up with the Dutch oven. It helped keep the bottom crust from over baking and becoming too dark and difficult to cut.
Jules says
Turned out fantastic ! I had to use a pizza stone and upturned Pyrex bowl but I am definitely investing in a Dutch oven after tasting this delicious bread , thanks so much for sharing 🙂
Jules says
Wow wow wow ! Incredibly tasty gf bread, simple with only a few ingredients , thank you so much for sharing your recipe 🙂
Holly T says
I have made this several times now with the Caputo GF flour and its amazing. I wanted to make this for my husband who isn't GF using the Caputo Tipo 00 Flour. Can I use this recipe for a non gluten free version with that four?
Olivia Parsons says
00 flour has very specific properties and uses. I cannot speak for another flour in this recipe. Try searching for a regular no knead bread recipe.
Jo-Ann says
My bread looked perfect, smelled good, tasted very good but when I cut the end piece it was difficult to cut at the bottom,even with a large serrated knife. The crust was tough to chew. Having some this AM and it was easier to slice. Going to try French Toast.
A question I have is I found the dough very sticky and loose after it rose making it difficult to put on the parchment. Is this how it should be?
Olivia Parsons says
Sometimes the bottom can get over-crisp, yes. When you remove the top off the dutch oven, maybe place the bread itself on the oven rack to avoid this (remove parchment paper). See process photos in the blog post for how the dough should look, it is a bit sticky. Be sure to weigh ingredients for the most accurate results.
Thea says
Can I use sourdough starter in stead of yeast ?
Olivia Parsons says
I have not tested this! This is a quick rise loaf, so using GF sourdough would change the recipe timing.
Anna says
Just want to clarify the amount of flour. You say 3 cups flour or 475 g. 475 g is almost 4 cups. I used 3 cups but it didn’t come out quite like it should have?
Olivia Parsons says
This flour is quite heavy - I recommend always following weight measurements when baking when possible! And - please see the step by step pictures to go by texture.
Nicole says
Hi there,
Could you use Red's 1 to 1 Flour instead?
I know that Cuputo Flour can contain milk.
Also, do you have any tips for the bread to not be doughy in the middle?
Olivia Parsons says
No other flour is the same in my experience! This bread should not be doughy - ensure it cooks hot enough for long enough and see the step by step pictures for the dough texture.
Teri says
The last two time I have made this bread it has been kind of gummy inside. Why would that be?
Olivia Parsons says
Are you measuring with a scale and using a dutch oven to bake? sounds like too much moisture from too much water or underbaking.
Teri says
Yes to everything except using a scale. I have always used a measuring cup but today I will weight it and see if it makes a difference. I think some of the problem is that the weather turned cold and I was letting it rise in a very warm mudroom. Now that isn't an option.
Blankis says
Oh my God is the best gluten free bread I ever tasted! My family can’t even tell it was gluten free. Just delicious 😋
Thank you Olivia for sharing this.
Danisha Dewberry says
I bought this GF flour, I am experiencing with baking all kinds of breads both GF and regular breads… oh my!!! This GF flour is so good..I can’t wait to try other recipes with it.
Olivia Parsons says
Isn't it unlike anything else?! That gluten-free wheat starch >>
Jill says
Made two loaves yesterday. Recipe is spot on, both came out perfect. Used a 4.5 qt cast iron Dutch oven. Put my dough in microwave to keep warmer and was perfect at 1 1/2 hours. Bread tastes fantastic and my non gluten free friend approved! I used a food scale to weight the flour. So glad I found this recipe.
Kelly says
My bread turned out great! I will be making this again.😁
Kay says
Is this flour available in the US? When I clicked your link, Amazon required me to switch to Canada, and the flour was unavailable. Or is there an equivalent that is available in the US?
Olivia Parsons says
It's absolutely in the US! Check your amazon.com, or local Italian stores.
Kimberly says
So easy and so delicious! I am not gluten free myself but some of my friends are. I made this for them and regular focaccia for the rest of us and it was all gone! You absolutely cannot tell its gluten free. I am going to try to make it into sandwich buns next. Amazing, thanks for this recipe! All my gluten free friends are scrambling to get the recipe!
Barbara says
I have all the ingredients and I'm looking forward to trying this.. the only problem I have is that I noticed that my yeast is active yeast and not instant yeast. Will active yeast work? I noticed you put it in more water anyway to make sure that it's active.. will it affect the rising time if I use to active versus instant yeast?
Olivia Parsons says
I have never used active yeast but from my research I think it should work! Just let the yeast and water activate for 10-15 minutes before adding the rest of the ingredients. Rising could take longer so place it in a warm spot like a turned off oven.
Dave G. says
I made this recipe and it is fantastic. I used 3 tsp of Kosher salt instead of fine sea salt. Baked in a loaf pan for 50 minutes (uncovered) at 450F and the bread was 210F. I will make another one next week and cover it for part of the time.
This is by far, the best gluten free bread I have made. I use the Caputo flour for Detroit Style pizza and it is a winner there as well.
Olivia Parsons says
I have a recipe for Caputo GF Detroit style pizza you should also try!
Susan says
Great gluten free bread and very easy.
Barbara says
Olivia, thank you for this wonderful recipe. I was always terrified about baking bread regretted not learning while my dad and my aunt were alive.. they could whip up pastries and all kinds of breads. This was easy and delicious and taste as good as the Italian bread my dad used to make with very simple ingredients. I am so happy to have a delicious gluten-free Italian bread that tastes like my dad's. The recipe was very easy.. the only thing I think I need a sharper bread knife. Thank you so much.
Debbie says
Best bread ever and so easy to make.
Could I make bread rolls with this recipe?
Olivia Parsons says
Definitely! Though I haven't tried it as baking time will likely be shorter!
Jasmine Lyn says
Made the recipe, exactly.
Fantastic! Haven't had a decent piece of bread
since celiac diagnosis. Caputo flour is magic.
Also ordered Caputo yeast.
Thank you!
Bev says
Hi there, stumbled across this recipe and it is rather phenomenal - for a gluten free bread it is definitely fit for human consumption....and deliciously so!! Of all the gluten free products, I generally find the store bought breads the most disappointing and really not pleasant to eat. I used, from South Africa, the Woolworths all purpose gluten free flour the first time, and the Woolworths gluten free bread flour the second time. Both worked really well. Thank you so much.
Olivia Parsons says
Thank you so much for your kind review!
etm567 says
When using instant yeast you don’t need to activate it. Just mix it in with your dry ingredients, but not the same time as salt.
Marianne says
This is by far the easiest GF bread I have made - love the simplicity of the recipe & how quickly a fresh loaf of bread is on the table! The crispy crust and soft interior is sublime - a big hit with my non GF family members. I frequently bake GF pizza, focaccia and other breads with Caputo Fiorgut flour- and buy the 5 kg (11 lb) package at my local Italian grocery (works out to about $14 Canadian per kilogram)
Followed the tip of a previous reviewer who put ceramic pie beads on the bottom of her dutch oven, and set a mug of water in the oven to create steam - yielded a beautiful texture.
Elena says
Love, love, love Caputo fiore glut flour. I only use it now. $$$ but flavor and texture mean everything when cooking and baking for others who are not celiac.