These gluten-free slice and bake sugar cookies are reminiscent of the classic holiday cookies from childhood. This version is homemade and easily dairy-free. Prepare to be impressed with yourself!

Slice and bake cookies are a holiday classic for many. There's the snowman cookies, the trees, the Santa, and the classic chocolate chip. But for celiacs and gluten intolerant folks, the options are slim.
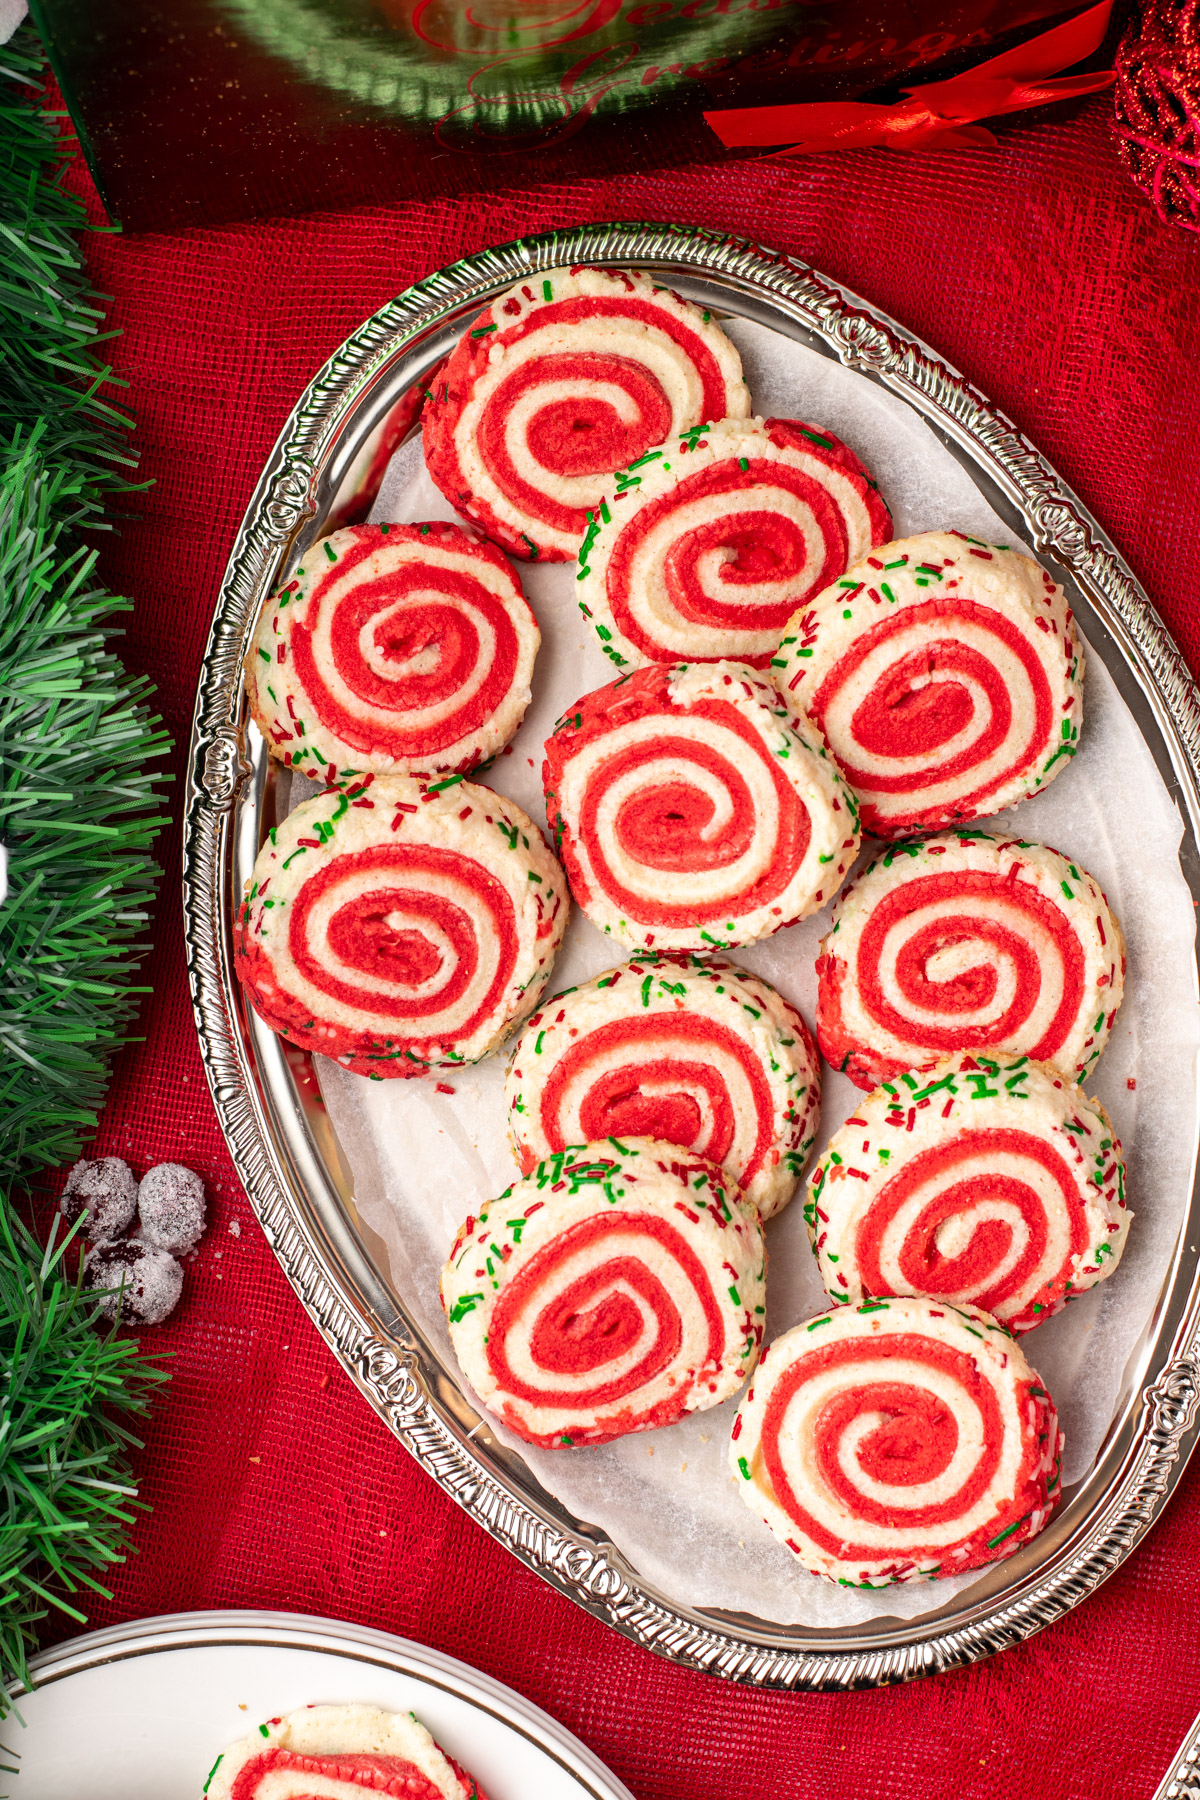
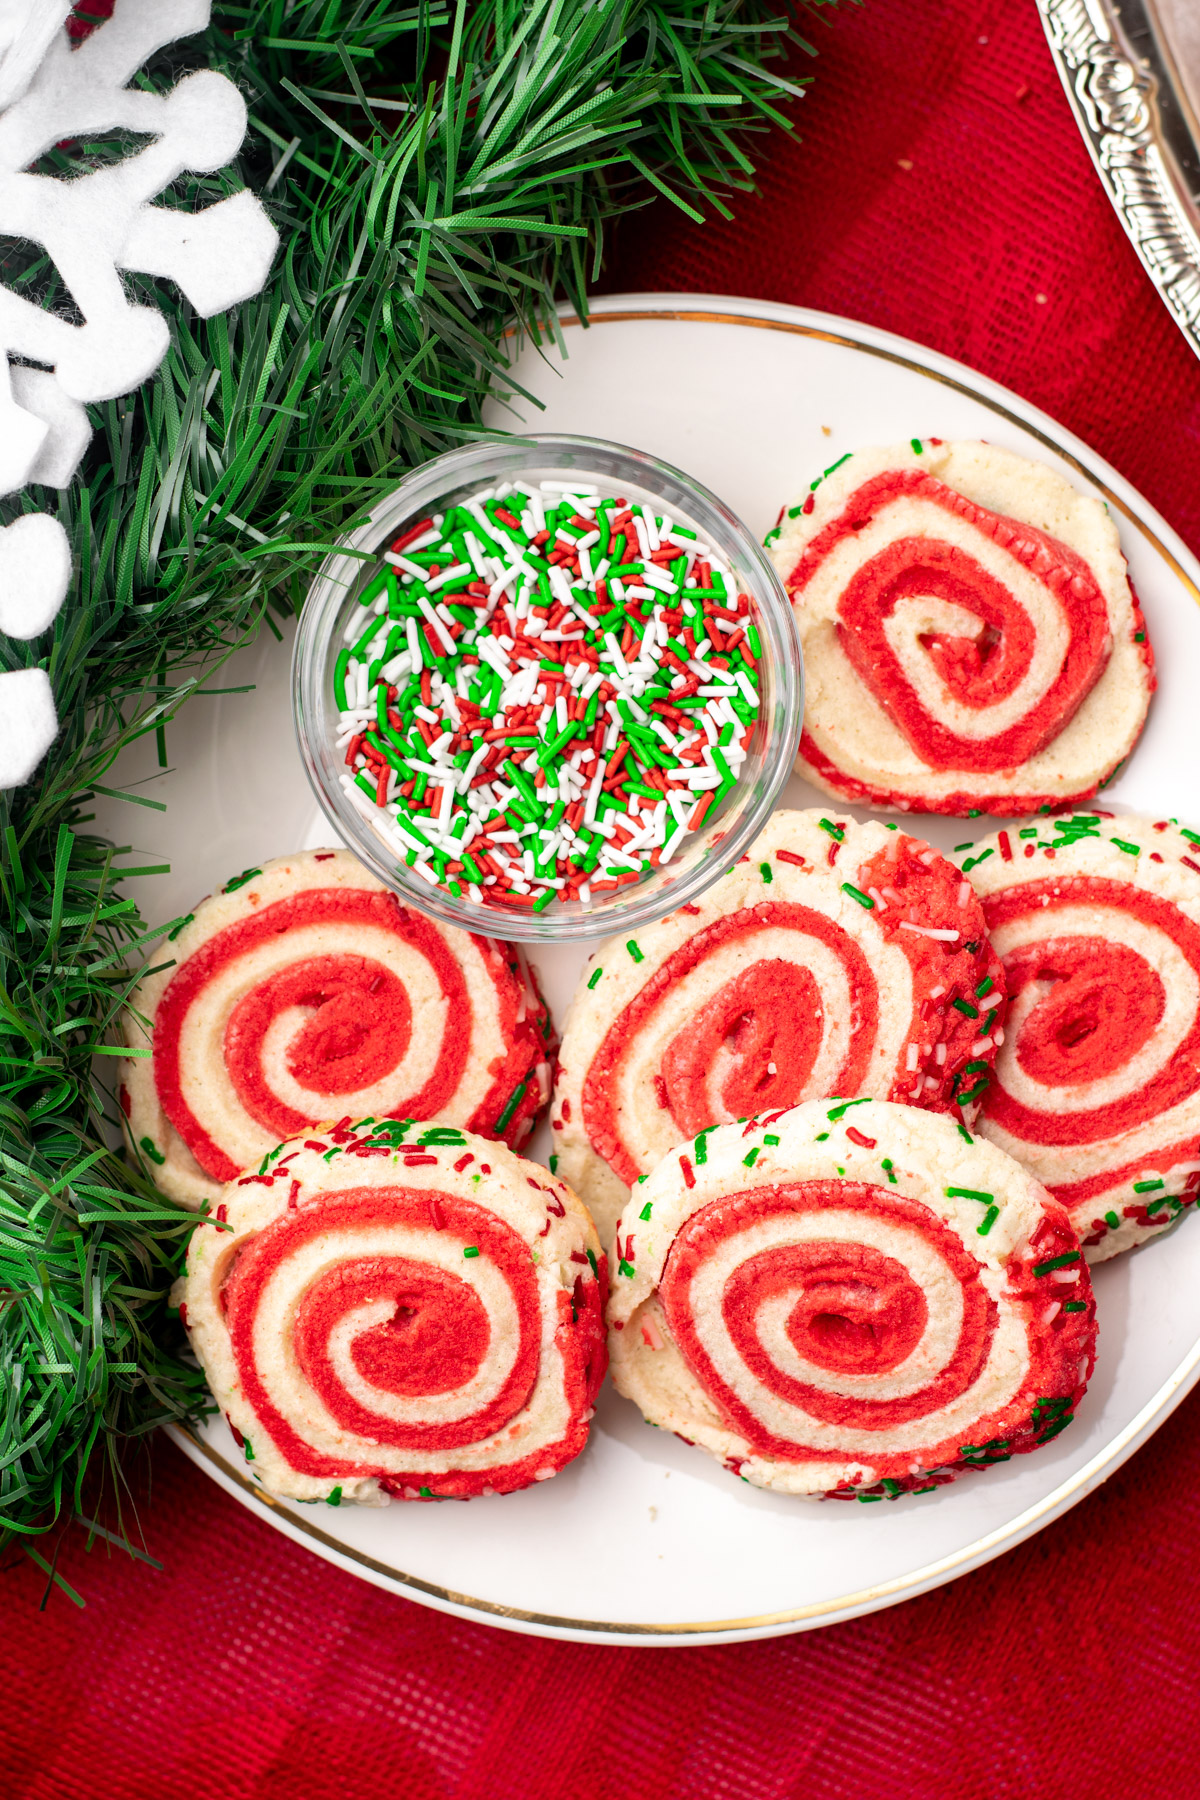
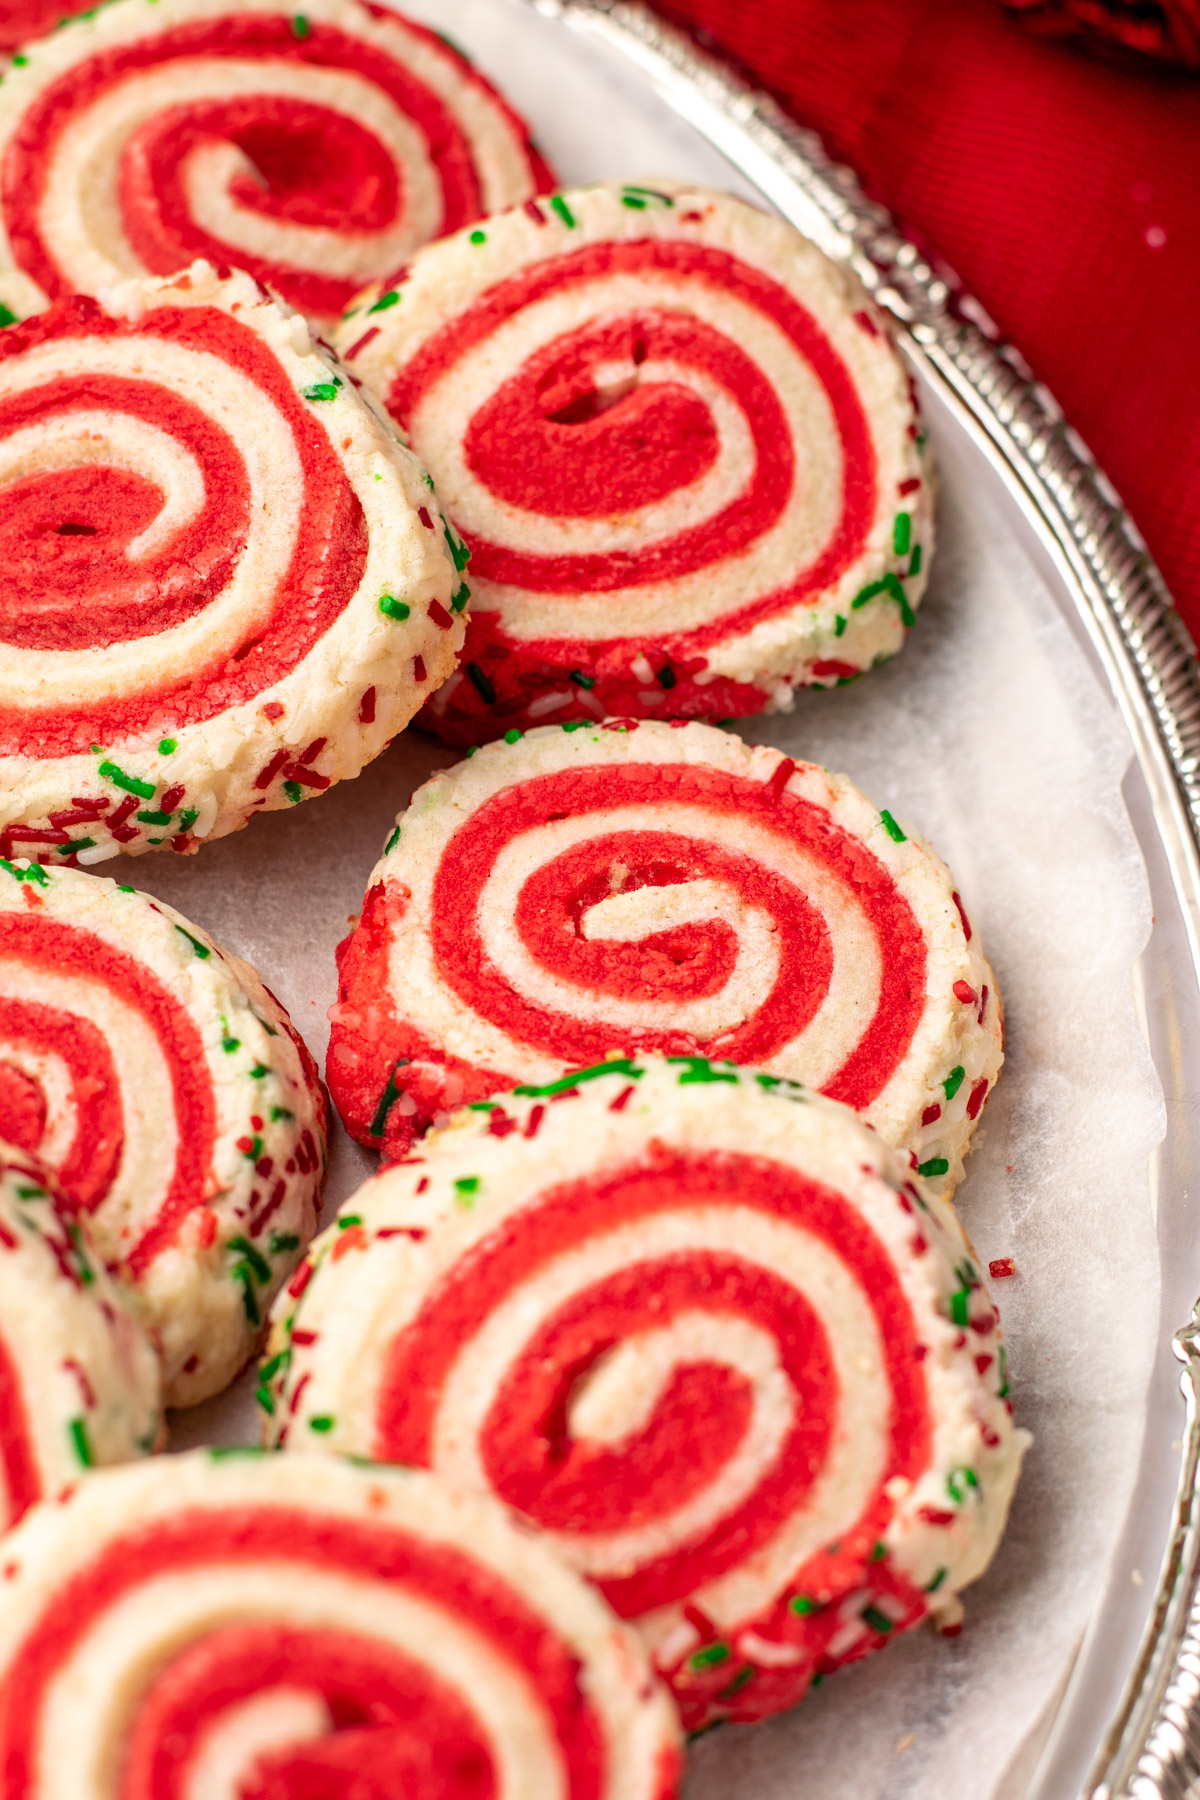
Introducing my homemade gluten-free (and easily dairy-free) slice and bake sugar cookies! These little cookies are smooth, sweet, and so fun to eat. Your friends and family will be so impressed when you pull these out at the holiday party. They're like little candy cane pinwheels!
Made from a simple sugar cookie dough with some colouring and a little elbow grease, these gluten-free slice and bake cookies are a delicious and impressive feat. But don't fret, they're actually super easy to make!
Want to know all of my tips and tricks for the most successful rolled slice and bake sugar cookies? I highly encourage you to read this entire blog post!
Looking for more gluten-free cookies & bars? Check out some of these:
- Gluten-Free Dairy-Free Millionaire Shortbread
- Super Fudgy Dairy-Free Brownies
- Gluten-Free Matcha Shortbread Cookies
- Gluten-Free Shortbread Cookies
Jump to:
What are Slice and Bake Cookies?
The concept of slice and bake cookies is all about ease and accessibility. The idea is that you make a batch of cookie dough, form it into a log, and keep it stashed in your freezer for when the craving strikes. When you want cookies, all you have to do is slice some from the log, and bake. It's really that simple!
These gluten-free slice and bake cookies take the concept up a notch by including a fun candy cane swirl design. One dough, 2 colours, a roll and that's it. Stash it away for when you want cookies... or bake them all cause they're that delicious. Keep reading for all of my tips and tricks for success, as well as possible customizations.
Why You'll Love This Recipe
- Easy to make. One sugar cookie dough is transformed into these swirled cookies.
- Allergy friendly. These cookies are gluten-free, nut-free, and easily dairy-free.
- Beautiful and looks impressive. Your friends and family will be so impressed that you made these gorgeous cookies. They don't know how simple it really is!
Ingredients Needed
Here is everything you'll need to make these gluten-free slice and bake cookies:
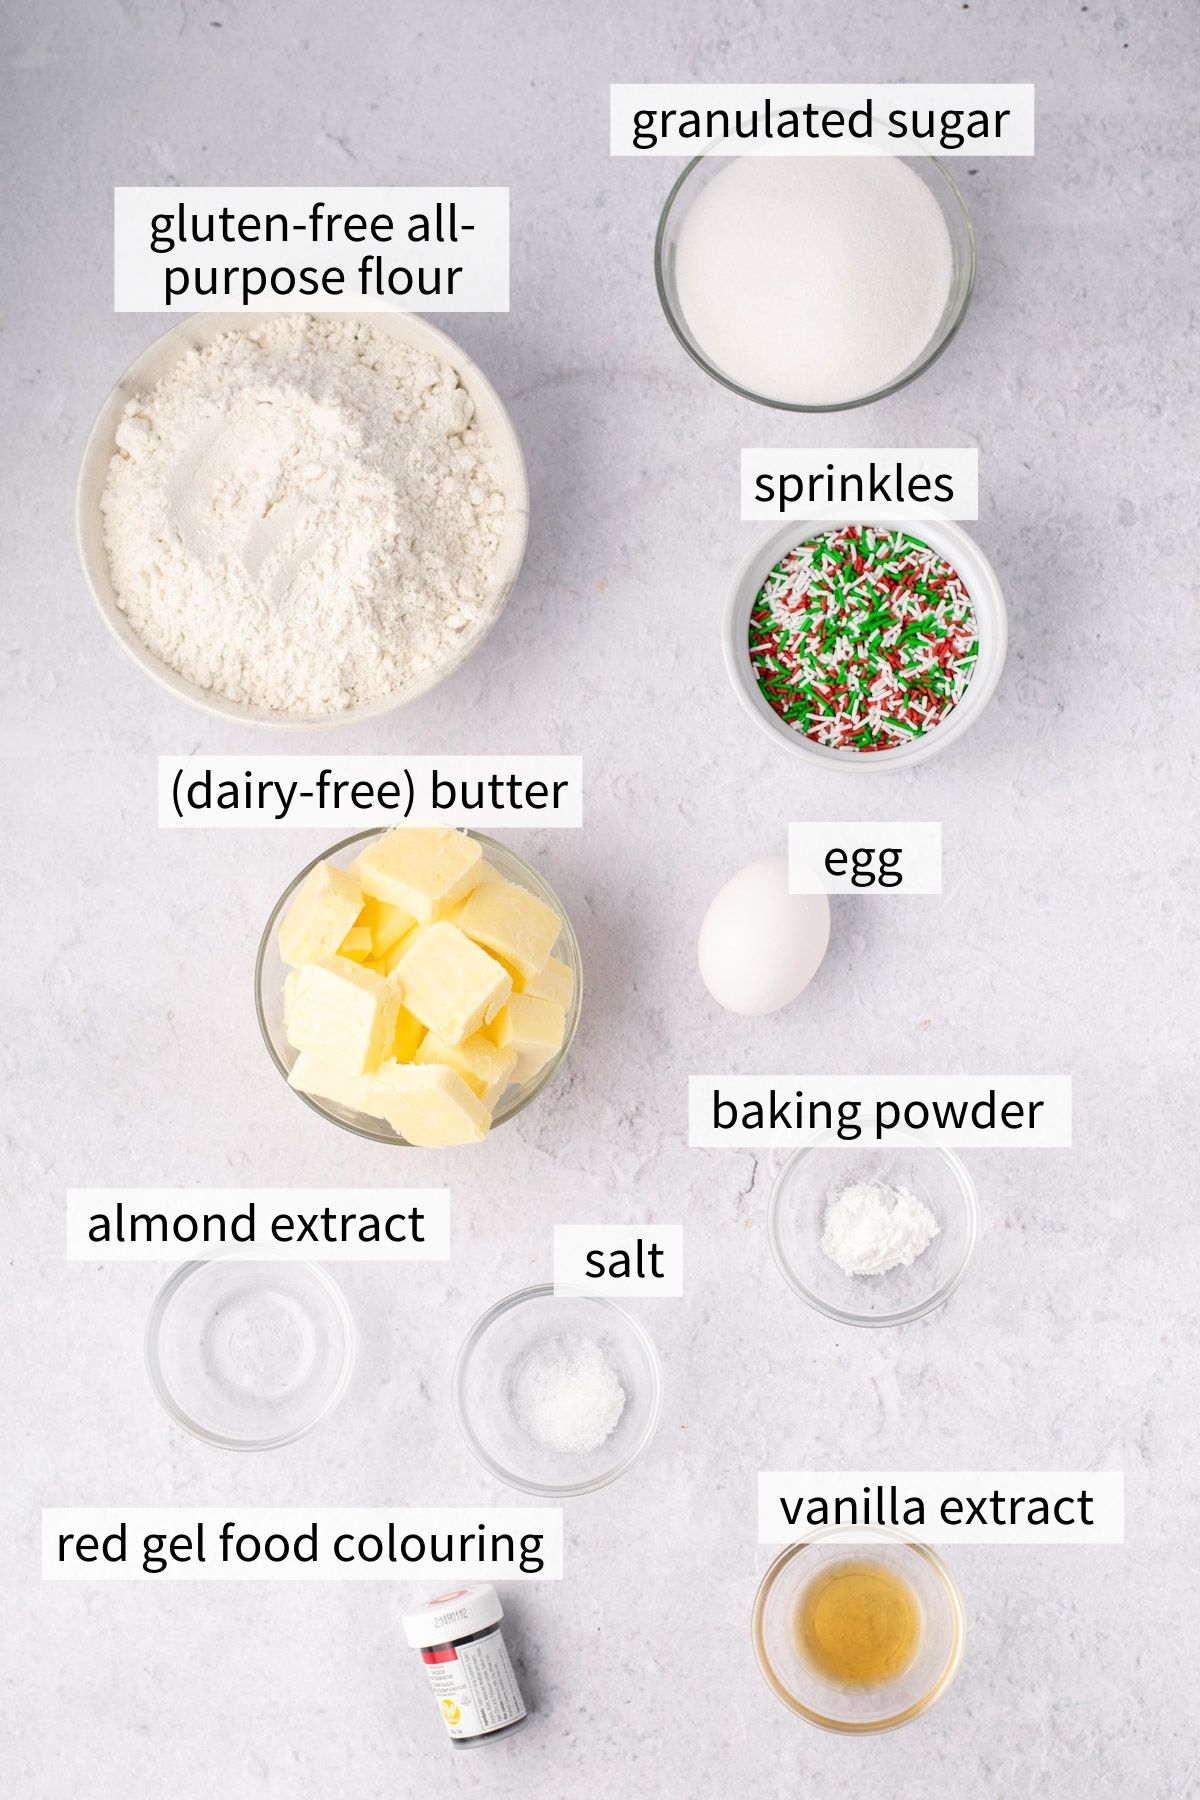
- Butter: I use salted butter. If using unsalted, add an extra ¼ teaspoon salt. Use dairy-free butter if you prefer. See note later in the post about the dairy-free version.
- Granulated sugar: Keeps the colour of the cookies light. Ensure you beat until the sugar is dissolved in the butter.
- Egg: Binds the dough together and makes it pliable. The egg is mandatory and cannot be substituted.
- Vanilla extract: Gives good flavour.
- Almond extract: Gives the cookies that classic sugar cookie taste.
- Gluten-free all-purpose flour with xanthan gum: I use Bob's Red Mill 1:1 Baking Flour (blue bag).
- Baking powder: For subtle rise.
- Salt: Add an extra ¼ teaspoon salt if using unsalted butter.
- Red gel food colouring: I recommend gel food colouring because it won't add liquid to your cookie dough. It is also a more concentrated colour. Dying the dough red may require a significant amount of dye. Start small and mix until you reach your desired colour. I use the Wilton gel food colouring.
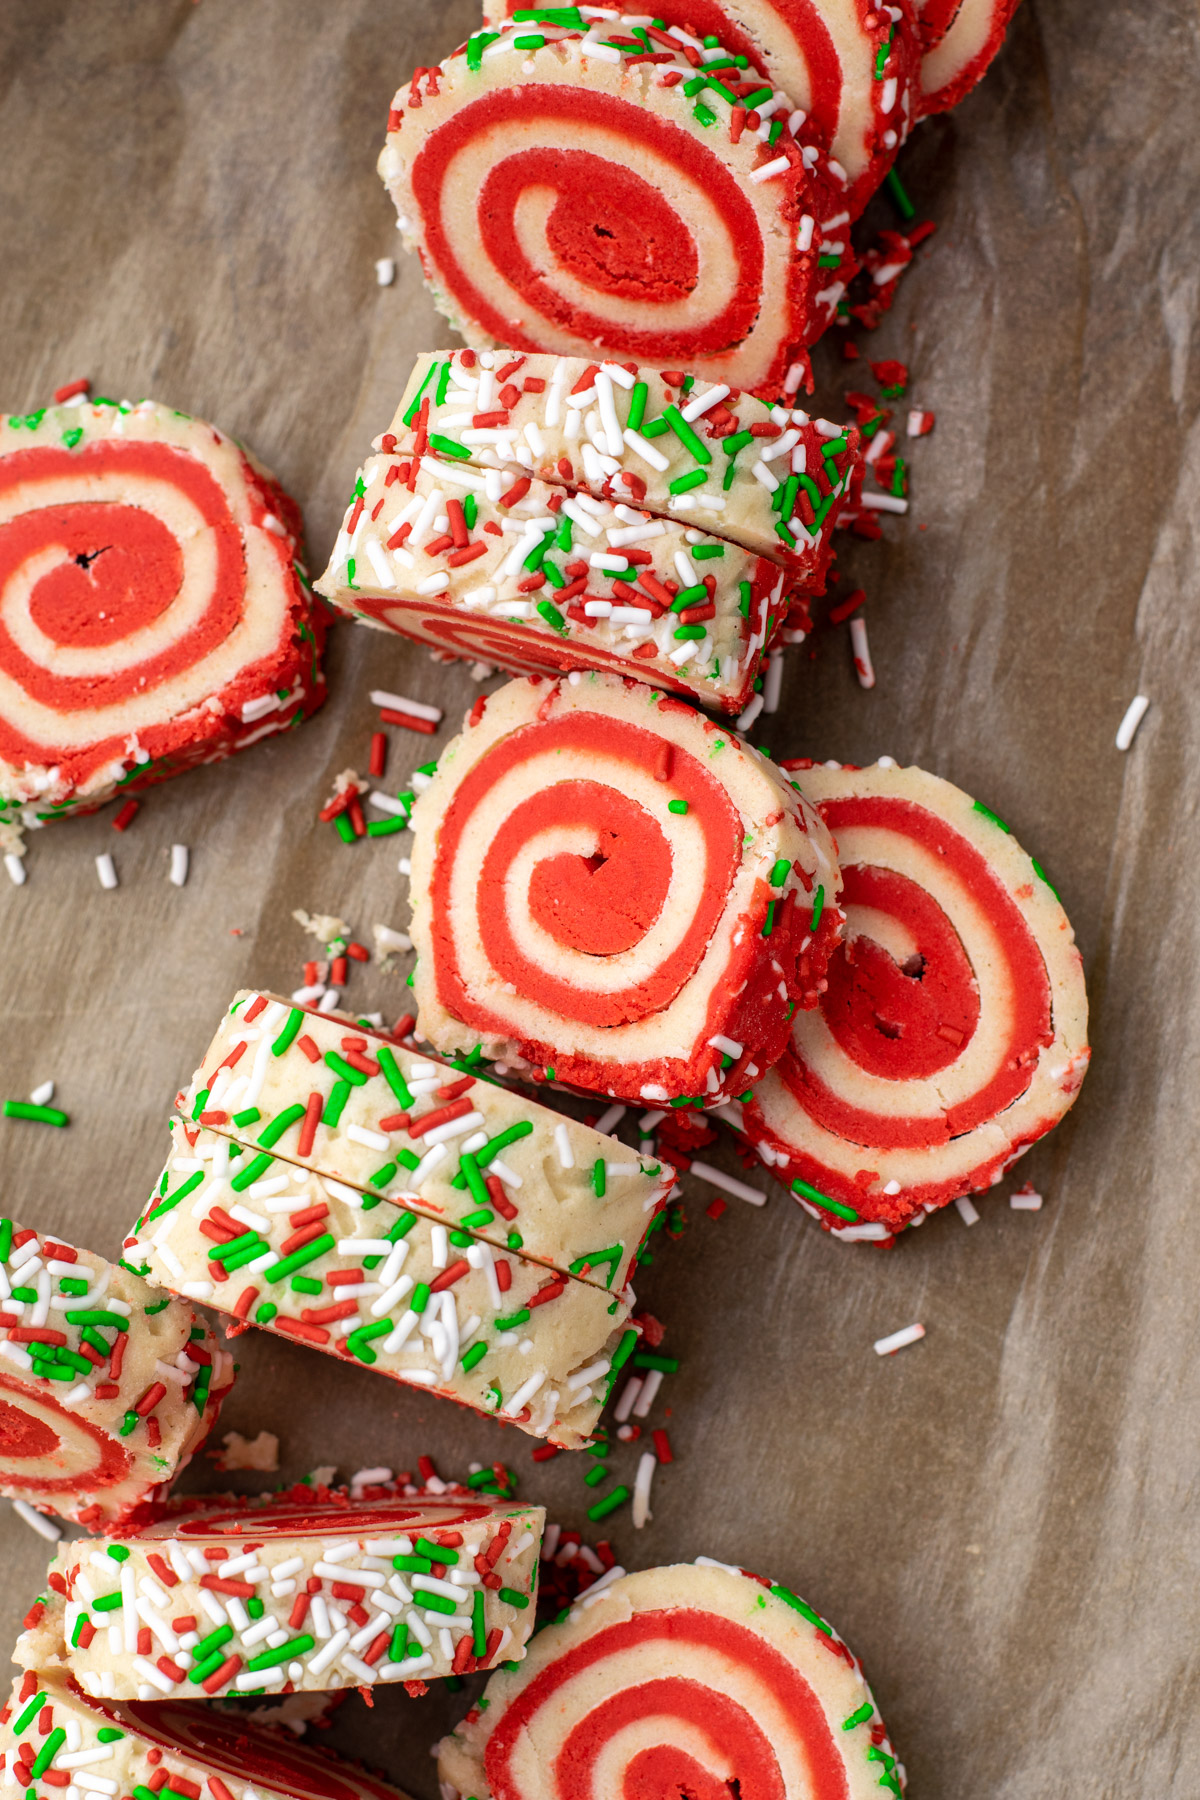
- Sprinkles: Grab some festive sprinkles to roll the cookie dough in. When sliced, the sprinkles will look like a border around the cookie.
Equipment Needed
- Stand or hand mixer: To mix the dough together.
- Rolling pin: To roll the dough into 2 large rectangles.
Step-by-Step Instructions
Be sure to read the recipe card below for the full ingredient list and instructions.
Make the sugar cookie dough
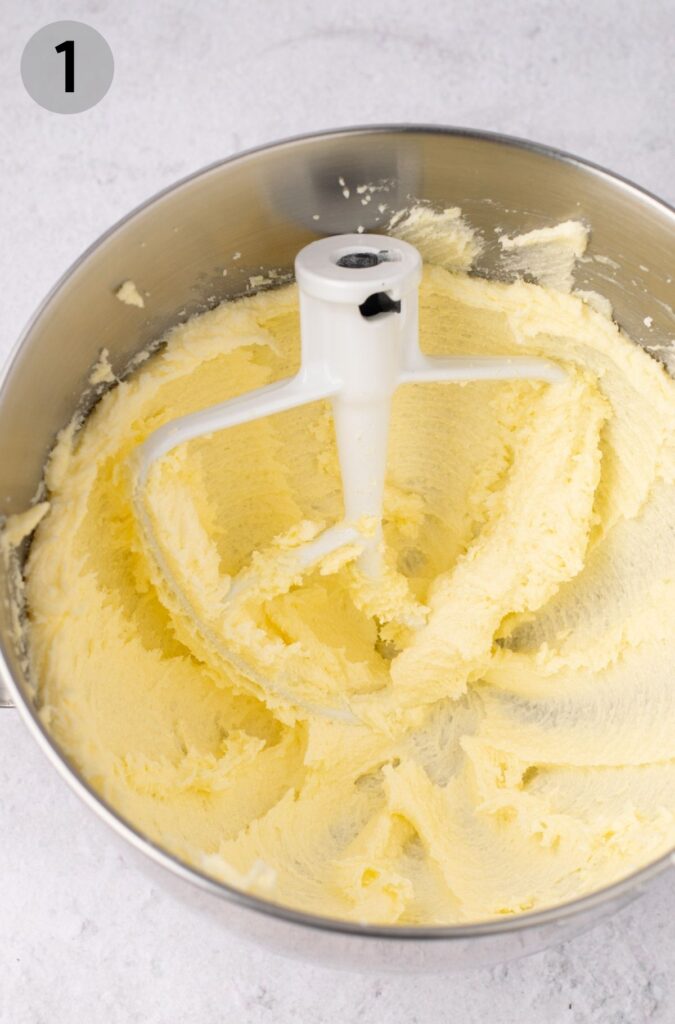
(1) In a stand mixer with the paddle attachment or in a large bowl with a hand mixer, beat the butter on medium speed for 2 minutes until fluffy. Add the granulated sugar and beat for another 2-3 minutes, scraping the bowl with a rubber spatula as needed.
(2) Mix in the egg and both extracts until combined.

(3) Add the flour, ½ cup at a time, mixing in between each addition. Start on low and gradually increase to medium speed. When half the flour is incorporated, mix in the baking powder and salt. Add all the flour and mix lightly until combined.
Shape the dough
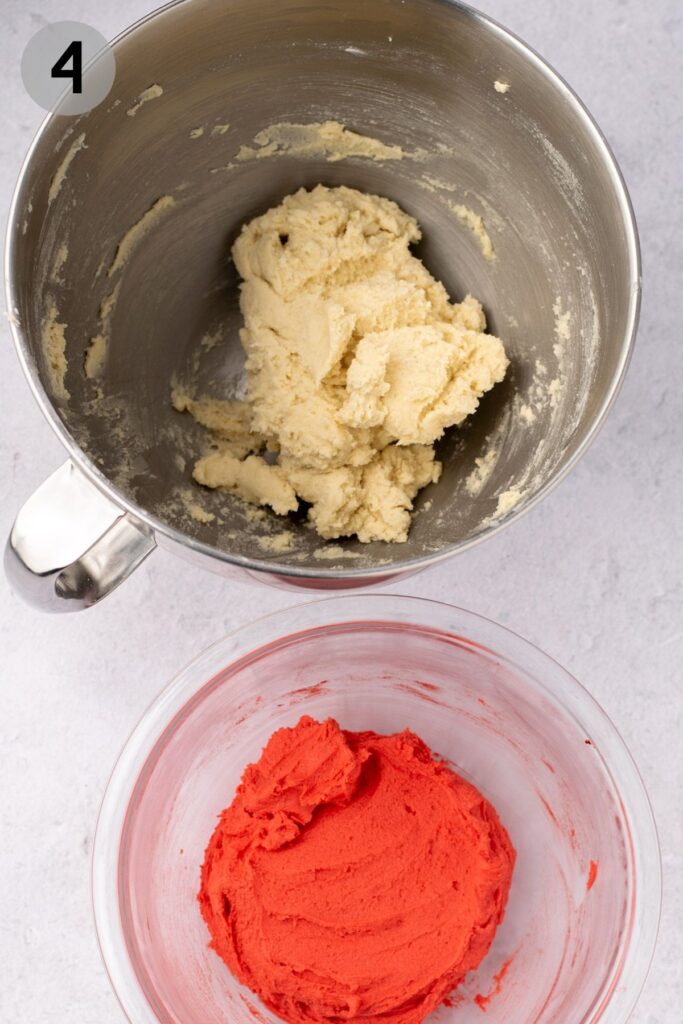
(4) Remove half of the cookie dough to a separate bowl. Colour one half with red gel food colouring and mix until you reach the desired colour. It may take more food colouring than you think.

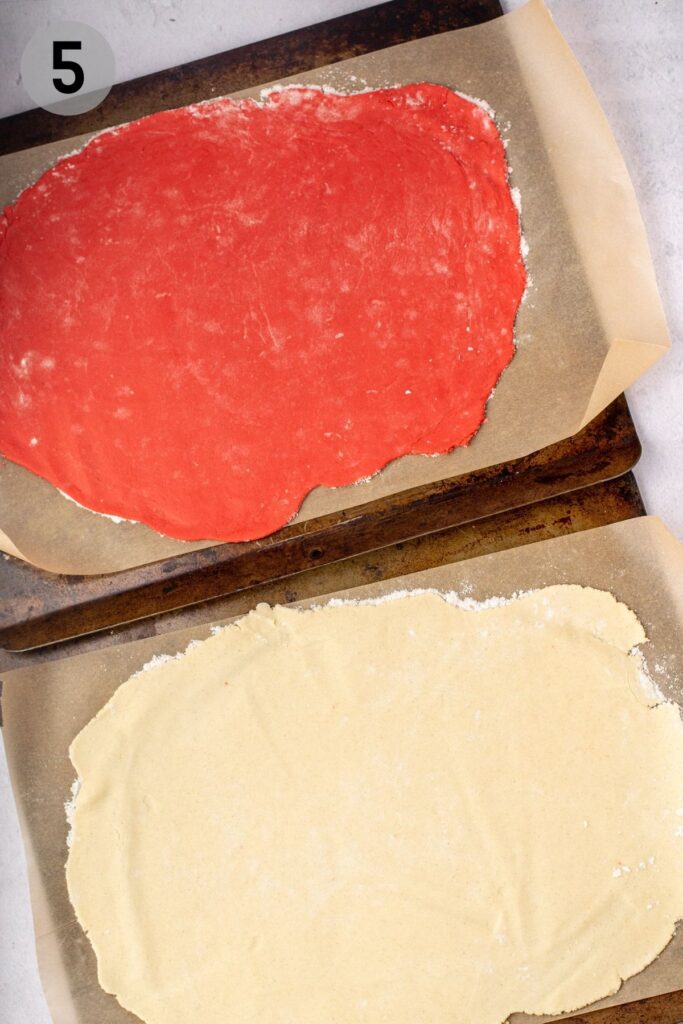
(5) Place each dough ball on a separate large sheet of parchment paper. Sprinkle with gluten-free flour on the top and bottom of the dough. Roll each dough into a rectangle as large as you can. They will be quite thin. You will trim the edges later. Place the parchment-lined doughs in the fridge for 20 minutes to firm up slightly. Do not leave for longer because they will be too firm to roll. (If you're using dairy-free butter, they may take longer to firm up).
Remove from the fridge and trim the edges into a clean rectangle. My rectangles were about 9.5x14". It's okay if yours are larger or smaller, as long as the red and white doughs are even. Combine the scraps to make an extra cookie or two!
(6) Use the parchment paper to help you place the red dough on top of the white dough, dough sides facing each other. Press down firmly to ensure they stick together, and remove the top parchment paper.

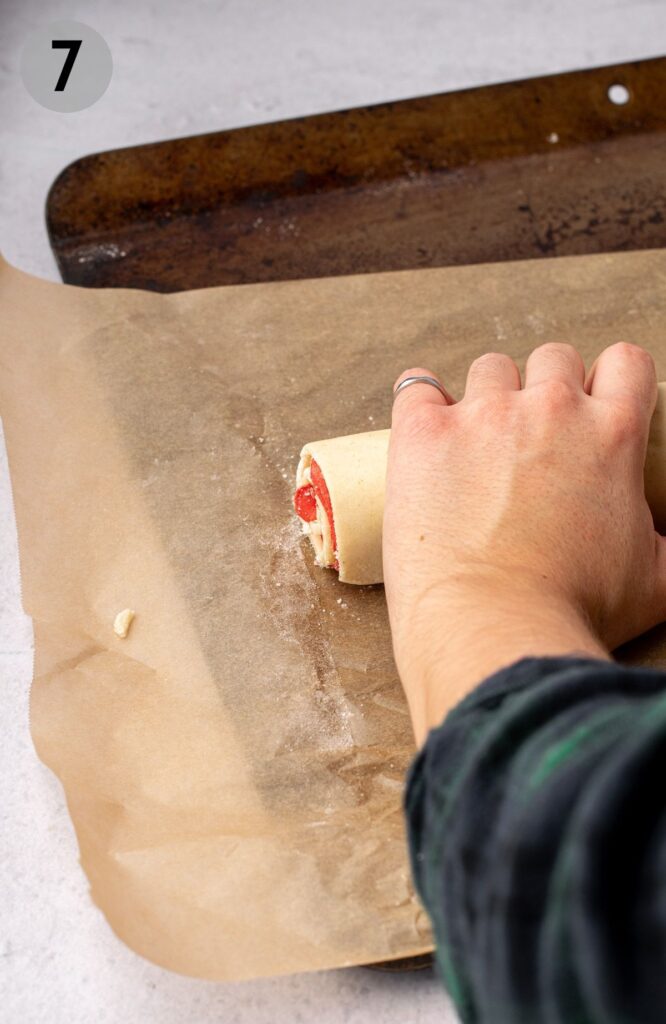
(7) & (8) From the long side, use the bottom parchment paper to help you roll the dough into a spiral. Roll tight and firmly to keep its shape. If the dough is sticking, put it back in the fridge for 10 minutes and try again.

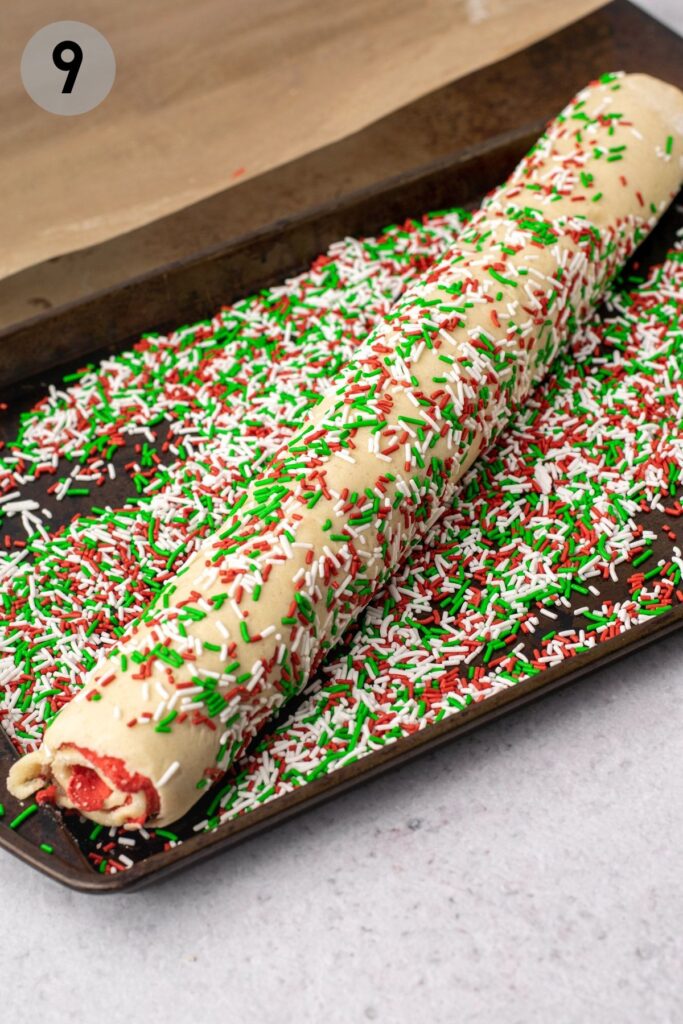
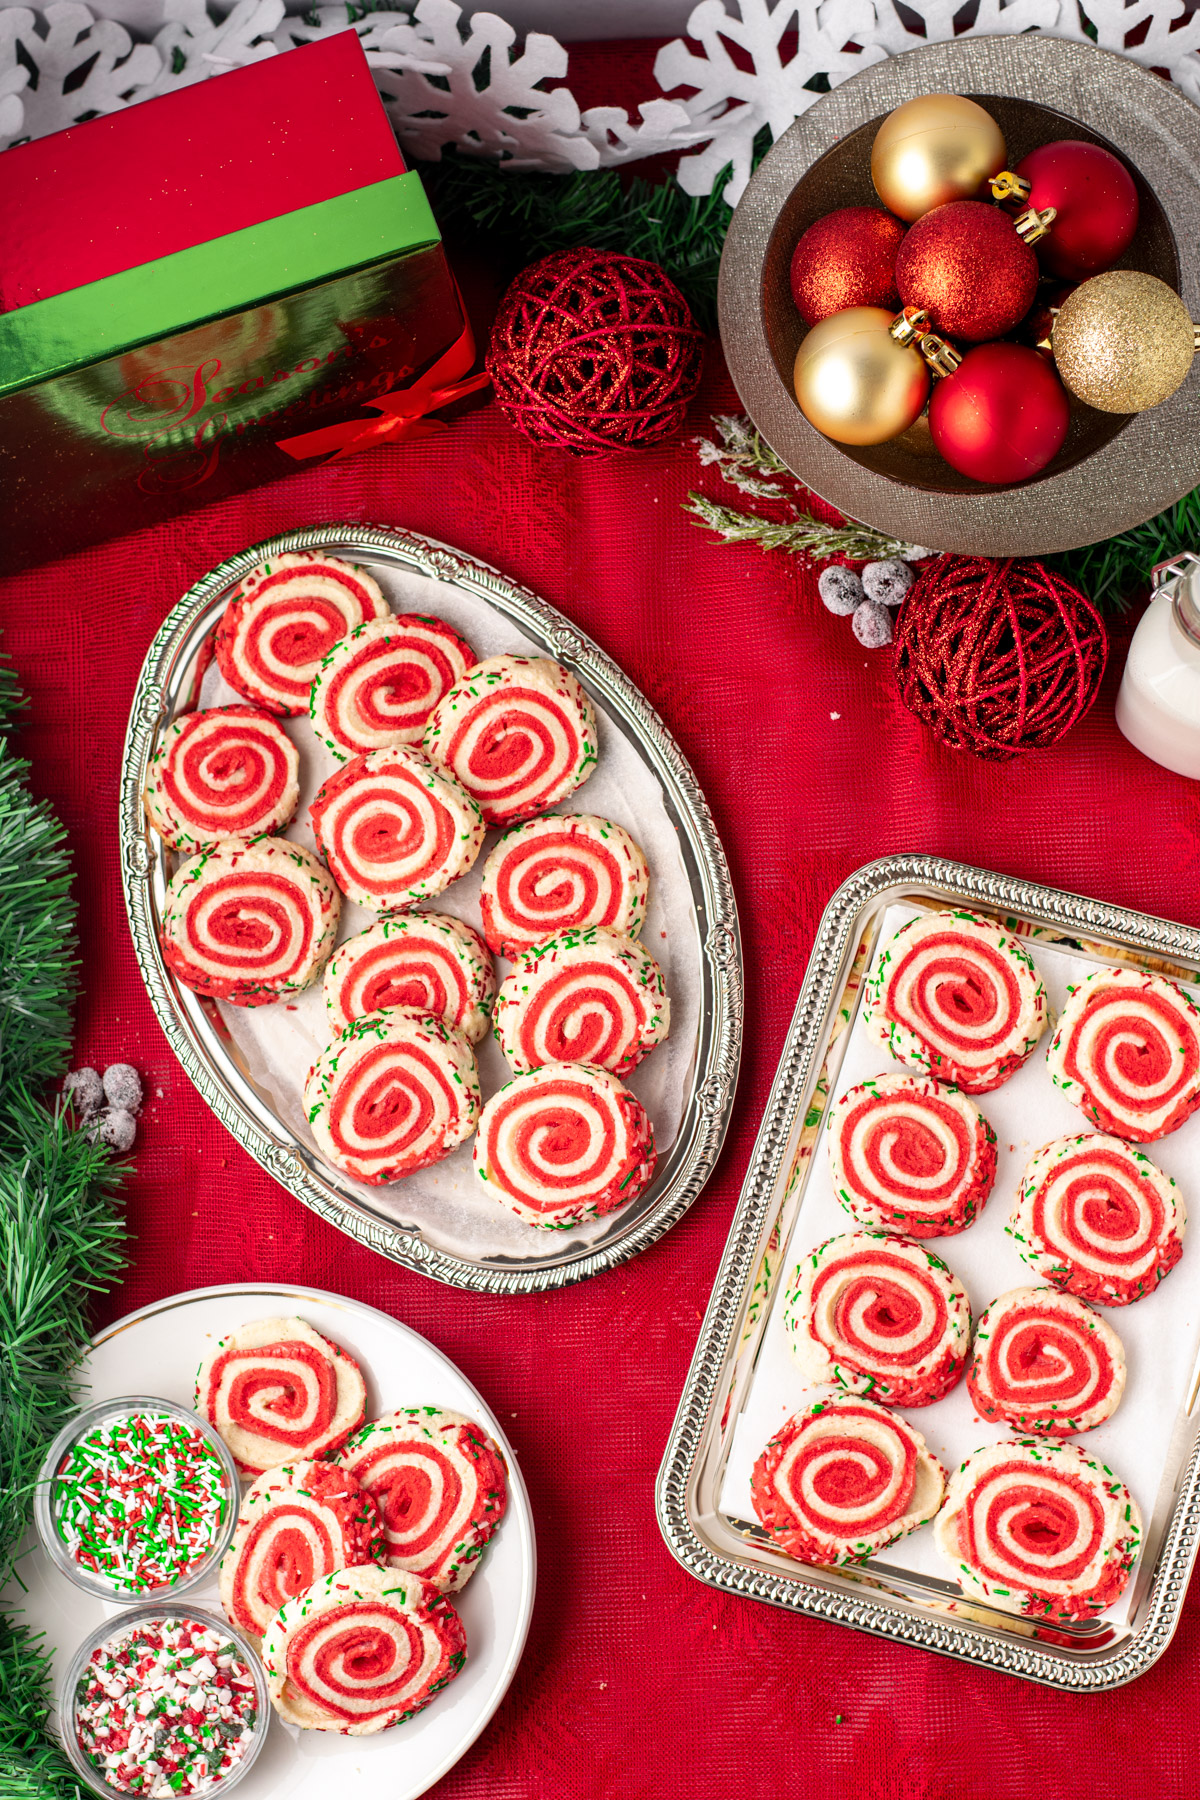
(9) Pour the sprinkles into a large rimmed baking sheet. Place the log of dough on the baking sheet and roll in the sprinkles to cover the outside.
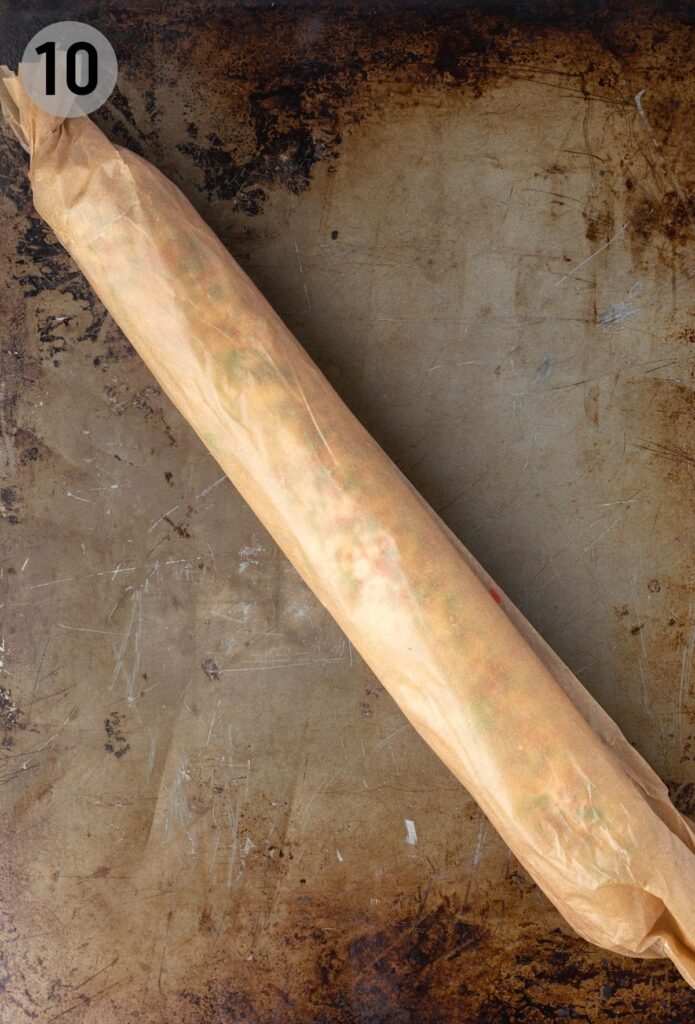
(10) Wrap the log in plastic wrap or parchment paper and place in the fridge for at least 2 hours, ideally overnight.
Slice and bake
After the dough has chilled sufficiently, preheat the oven to 350°F and line 2 large baking sheets with parchment paper.
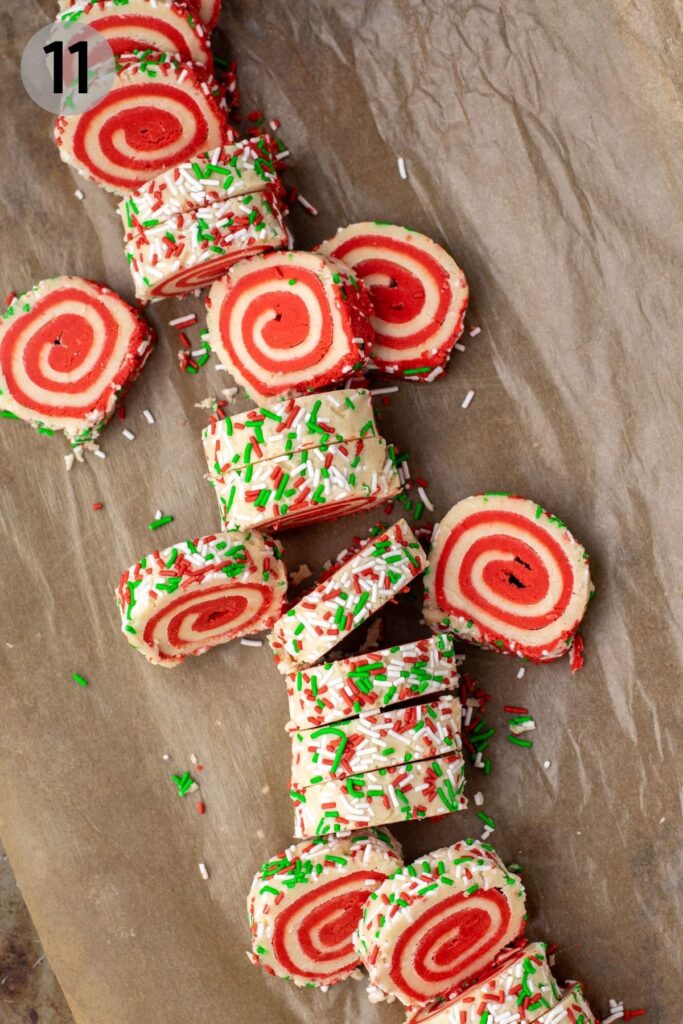
(11) Remove the cookie dough log from the fridge and un-wrap it. Use a sharp knife to firmly slice the log into cookies about 1 cm thick (⅓-½"). If you see any gaps in the spiral shape, gently press the cookie together.
(12) Place the cookies on the baking sheets 2" apart. They will spread a bit. Bake until the edges are set and there is barely any colour, 12-13 minutes. Let cool on the baking sheet until you are able to handle the cookies, then transfer to a wire rack to cool completely. See below for storage instructions and enjoy!

How to Make Dairy-Free Slice and Bake Sugar Cookies
These cookies can be made with dairy-free butter if that is your preference. Since they are often made from plant-based oils, dairy-free butters are typically a lot softer than regular butter. Here are some tips if working with dairy-free butter:
- Don't let it soften for too long. You want it to be soft but still cool.
- You may need to add up to ¼ cup of additional flour to the cookie dough so it is not too sticky.
- The dough may also need additional flour when rolling. Try placing a second piece of parchment paper on top if it is too sticky to roll.
- The rectangles may need more than 20 minutes to firm up before rolling into a log. You don't want the dough to be solid, but you want to ensure it won't stick to the parchment paper.
- Watch the baking time. If your cookies are too golden, remove them from the oven.
Storage & Freezing Instructions
Storage Instructions: Baked cookies will keep in an airtight container at room temperature for up to 5 days.
Freezing Instructions:
Cookie dough logs can be frozen whole for up to 2 months, wrapped tightly in 2 layers of plastic wrap and placed in an airtight container. Thaw until you are able to slice into cookies, then bake.
Pre-cut cookie dough can be frozen in an airtight container for up to 2 months. Bake right from frozen. They may take a few minutes longer.
Baked cookies can be frozen in an airtight container for up to 2 months. Thaw at room temperature and enjoy!
Customizations
Here are a few suggestions if you're looking to make customizations to this recipe:
- Dairy: See the above section if you are making these cookies dairy-free. It is very simple but there are a few additional considerations to make these cookies perfect.
- Flavours: Play around with the extracts, or include mix-ins like nuts, dried fruits, or chocolate chunks.
- Pattern: Instead of the candy cane swirl, why not try another pattern like a green Christmas tree. Or forego the pattern and just mold the dough into a solid log for an even easier cookie.
- Decoration: Use sprinkles of your choice on the outside! I would avoid something that could melt like candy canes or chocolate.
Expert Tips
Here are some of my top tips and tricks for successful gluten-free slice and bake cookies:
- Keep the cookie dough as cold as possible. This will help at all stages of prep.
- Use gluten-free flour or parchment paper to help roll the dough.
- If the cookie dough is too sticky, chill. A few minutes in the fridge will help the workability of the dough, especially if working with dairy-free butter.
- Read the above section on working with dairy-free butter. There are specific tips that may help, since dairy-free butter can be softer than regular butter.
- Roll the cookie dough log very tight and press it together. You want to make sure the red and white doughs are binded together well.
- Don't rush the chill! This is very important for slice and bake cookies. Cold dough means cleaner cuts and prettier cookies.
- Squeeze the cookies if you see gaps in the roll. Once you slice the cookies, if you notice that the red and white dough is separating anywhere, give it a gentle squeeze to press into 1 piece. If the 2 doughs are not compressed, they may split in the oven.
- Ensure cookies are cold before baking. This will prevent large cookie spread and will keep them looking pretty.
Frequently Asked Questions
These gluten-free slice and bake sugar cookies can easily be made dairy-free by using a plant-based butter. See notes in the instructions section, as there are a few additional considerations when using dairy-free butter. Unfortunately the egg is integral in binding the sugar cookie dough and making sure it is pliable to roll into the swirl. So no, I have not tried to make these cookies vegan. If you have, leave a comment below about how it went!
YES! Slice and bake cookies depend on being chilled long enough. The first chill is after rolling out the dough super thin. This is a quick chill for about 20 minutes so that the dough will remove easily from the parchment paper for rolling the swirl. The second chill is the most important, where the entire cookie dough log chills. It is important that the dough is extremely cold and firm before slicing. This will ensure you achieve perfect cuts, and that the cookies will not spread too much in the oven. Make the cookie dough log the night before and chill overnight for an easier prep!
Use a sharp knife to firmly slice the chilled log into cookies about 1 cm thick (⅓-½"). If you see any gaps in the spiral shape, gently press the cookie together.
Cookie dough logs can be frozen whole for up to 2 months, wrapped tightly in 2 layers of plastic wrap and placed in an airtight container. Thaw just until you are able to slice into cookies, then bake.
Pre-cut cookie dough can be frozen in an airtight container for up to 2 months. Bake right from frozen. They may take a few minutes longer.
These gluten-free slice and bake sugar cookies are sure to be a hit at your next holiday party! They're sweet, chewy, and oh so gorgeous. Your friends and family will be so impressed with these beautiful and delicious cookies. Not to mention they're allergy friendly, easily dairy-free, and nut-free.
Have you made these gluten-free slice and bake sugar cookies? I would love if you leave a 5-star review below and tag me on instagram @fromoliviaskitchen. I hope you enjoy as much as I do!
More Gluten-Free Holiday Treats


Recipe

Gluten-Free Slice and Bake Sugar Cookies
Equipment
- Stand or hand mixer
- Rolling Pin
Ingredients
- 1 cup butter, salted and softened use dairy-free if you prefer. See note below about the dairy-free version.
- 1 cup granulated sugar
- 1 large egg
- 2 teaspoon vanilla extract
- ½ teaspoon almond extract
- 2¼ cups gluten-free all-purpose flour with xanthan gum I use Bob's Red Mill 1:1 Baking Flour (blue bag)
- ½ teaspoon baking powder
- ¼ teaspoon salt add an extra ¼ teaspoon salt if using unsalted butter
- red gel food colouring
- ⅔ cup sprinkles
Instructions
Make the sugar cookie dough
- In a stand mixer with the paddle attachment or in a large bowl with a hand mixer, beat the butter on medium speed for 2 minutes until fluffy. Add the granulated sugar and beat for another 2-3 minutes, scraping the bowl with a rubber spatula as needed. Mix in the egg and both extracts until combined.
- Add the flour, ½ cup at a time, mixing in between each addition. Start on low and gradually increase to medium speed. When half the flour is incorporated, mix in the baking powder and salt. Add all the flour and mix lightly until combined.
Shape the dough
- Remove half of the cookie dough to a separate bowl. Colour one half with red gel food colouring and mix until you reach the desired colour. It may take more food colouring than you think.
- Place each dough ball on a separate large sheet of parchment paper. Sprinkle with gluten-free flour on the top and bottom of the dough. Roll each dough into a rectangle as large as you can. They will be quite thin. You will trim the edges later. Place the parchment-lined doughs in the fridge for 20 minutes to firm up slightly. Do not leave for longer because they will be too firm to roll. (If you're using dairy-free butter, they may take longer to firm up).
- Remove from the fridge and trim the edges into a clean rectangle. My rectangles were about 9.5x14". It's okay if yours are larger or smaller, as long as the red and white doughs are even. Combine the scraps for an extra cookie or two!
- Use the parchment paper to help you place the red dough on top of the white dough, dough sides facing each other. Press down firmly to ensure they stick together, and remove the top parchment paper. From the long side, use the bottom parchment paper to help you roll the dough into a spiral. Roll tight and firmly to keep its shape. If the dough is sticking, put it back in the fridge for 10 minutes and try again.
- Pour the sprinkles into a large rimmed baking sheet. Place the log of dough on the baking sheet and roll in the sprinkles to cover the outside. Wrap the log in plastic wrap or parchment paper and place in the fridge for at least 2 hours, ideally overnight.
Slice and bake
- After the dough has chilled sufficiently, preheat the oven to 350°F and line 2 large baking sheets with parchment paper.
- Remove the cookie dough log from the fridge and un-wrap it. Use a sharp knife to firmly slice the log into cookies about 1 cm thick (⅓-½"). If you see any gaps in the spiral shape, gently press the cookie together. Place the cookies on the baking sheets 2" apart. They will spread a bit. Bake until the edges are set and there is barely any colour, 12-13 minutes. Let cool on the baking sheet until you are able to handle the cookies, then transfer to a wire rack to cool completely. See below for storage instructions and enjoy!
Notes
- Don't let it soften for too long. You want it to be soft but still cool
- You may need to add up to ¼ cup of additional flour to the cookie dough so it is not too sticky.
- You may also need additional flour when rolling out the dough. Try placing a second piece of parchment paper on top if it is too sticky to roll.
- The rectangles may need more than 20 minutes to firm up before rolling into a log. You don't want the dough to be solid, but you want to ensure it won't stick to the parchment paper.
- Watch the baking time. If your cookies are too golden, remove them from the oven.
Shannon says
This recipe was terrible to work with. I followed every direction to a T, the only thing I switched was using natural food coloring and the dough was not able to be rolled out. So disappointed as I wasted a lot of ingredients on this recipe.
Olivia Parsons says
Sorry to hear this—did you use regular or dairy free butter block? Did you chill the dough? Could you have used more flour to roll it out?