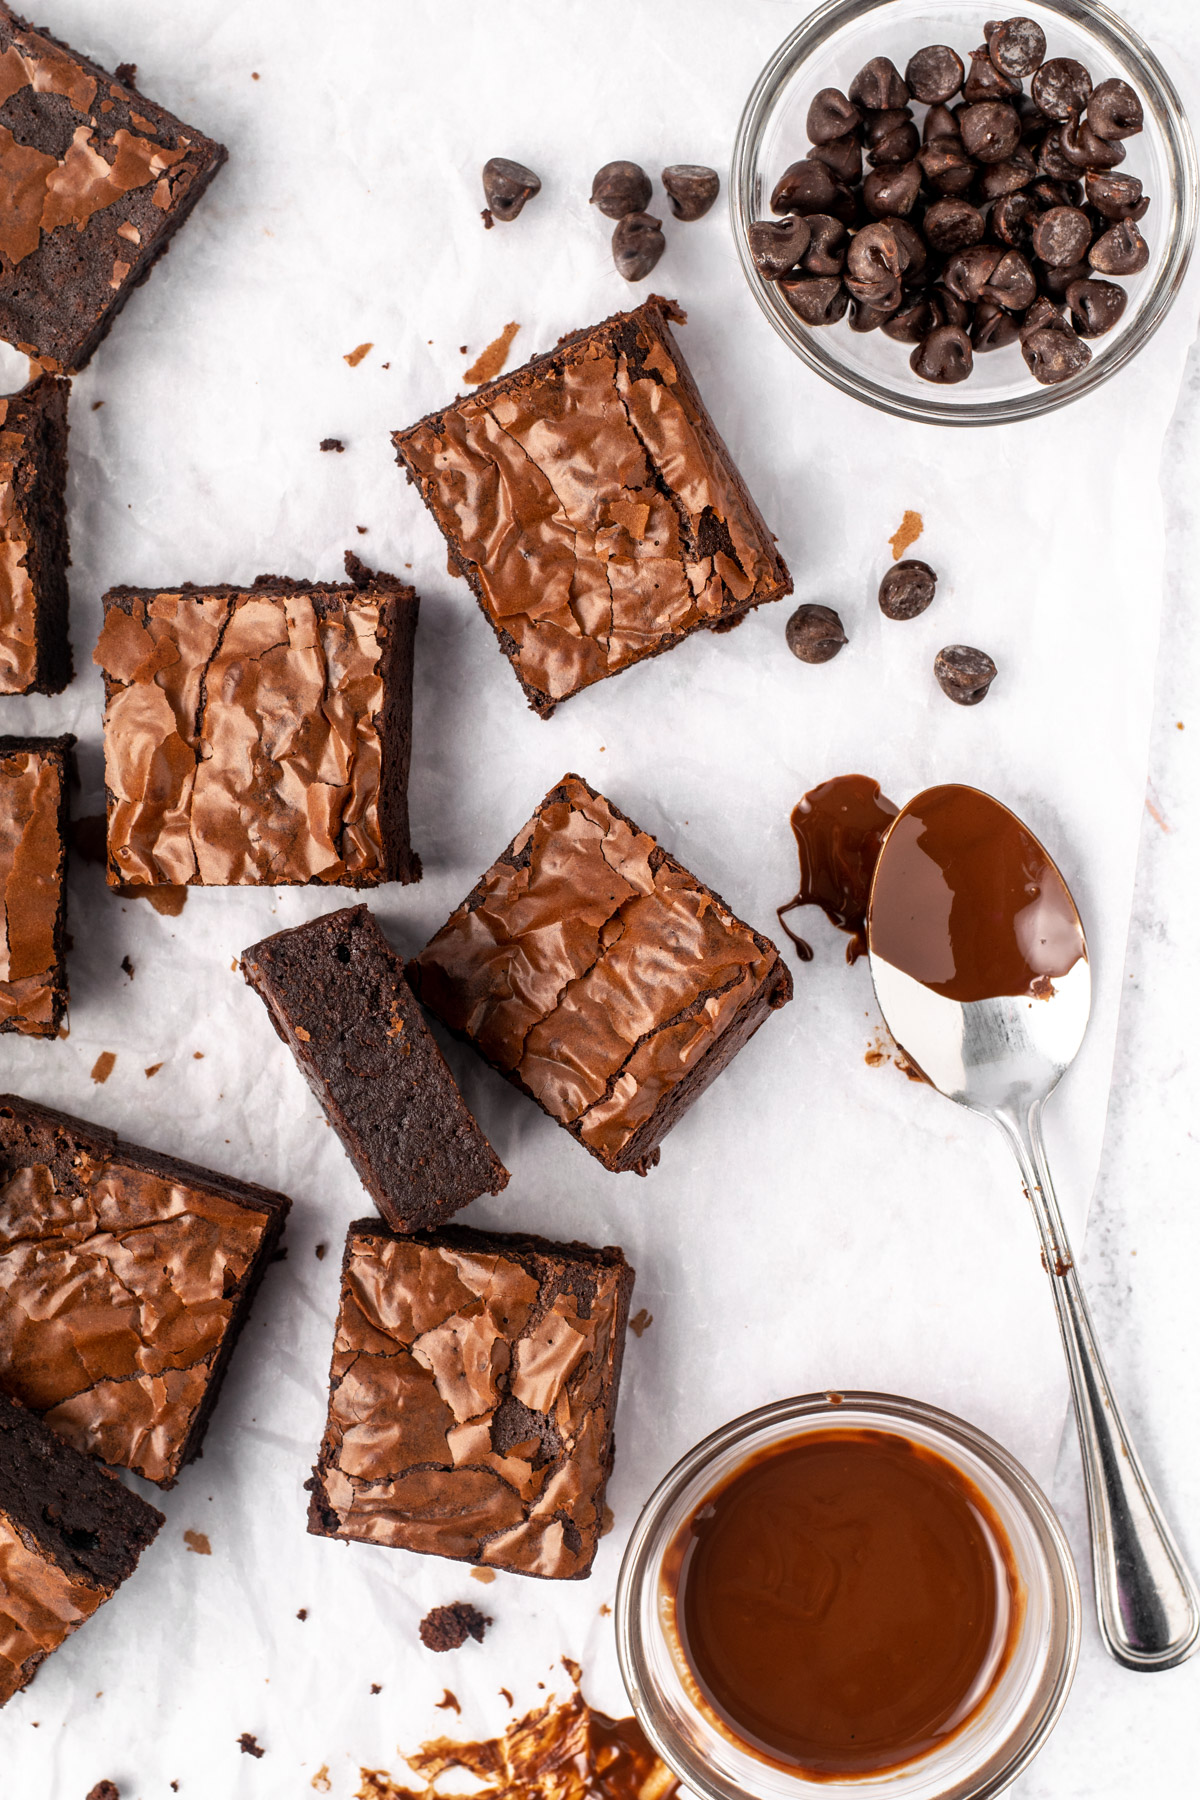
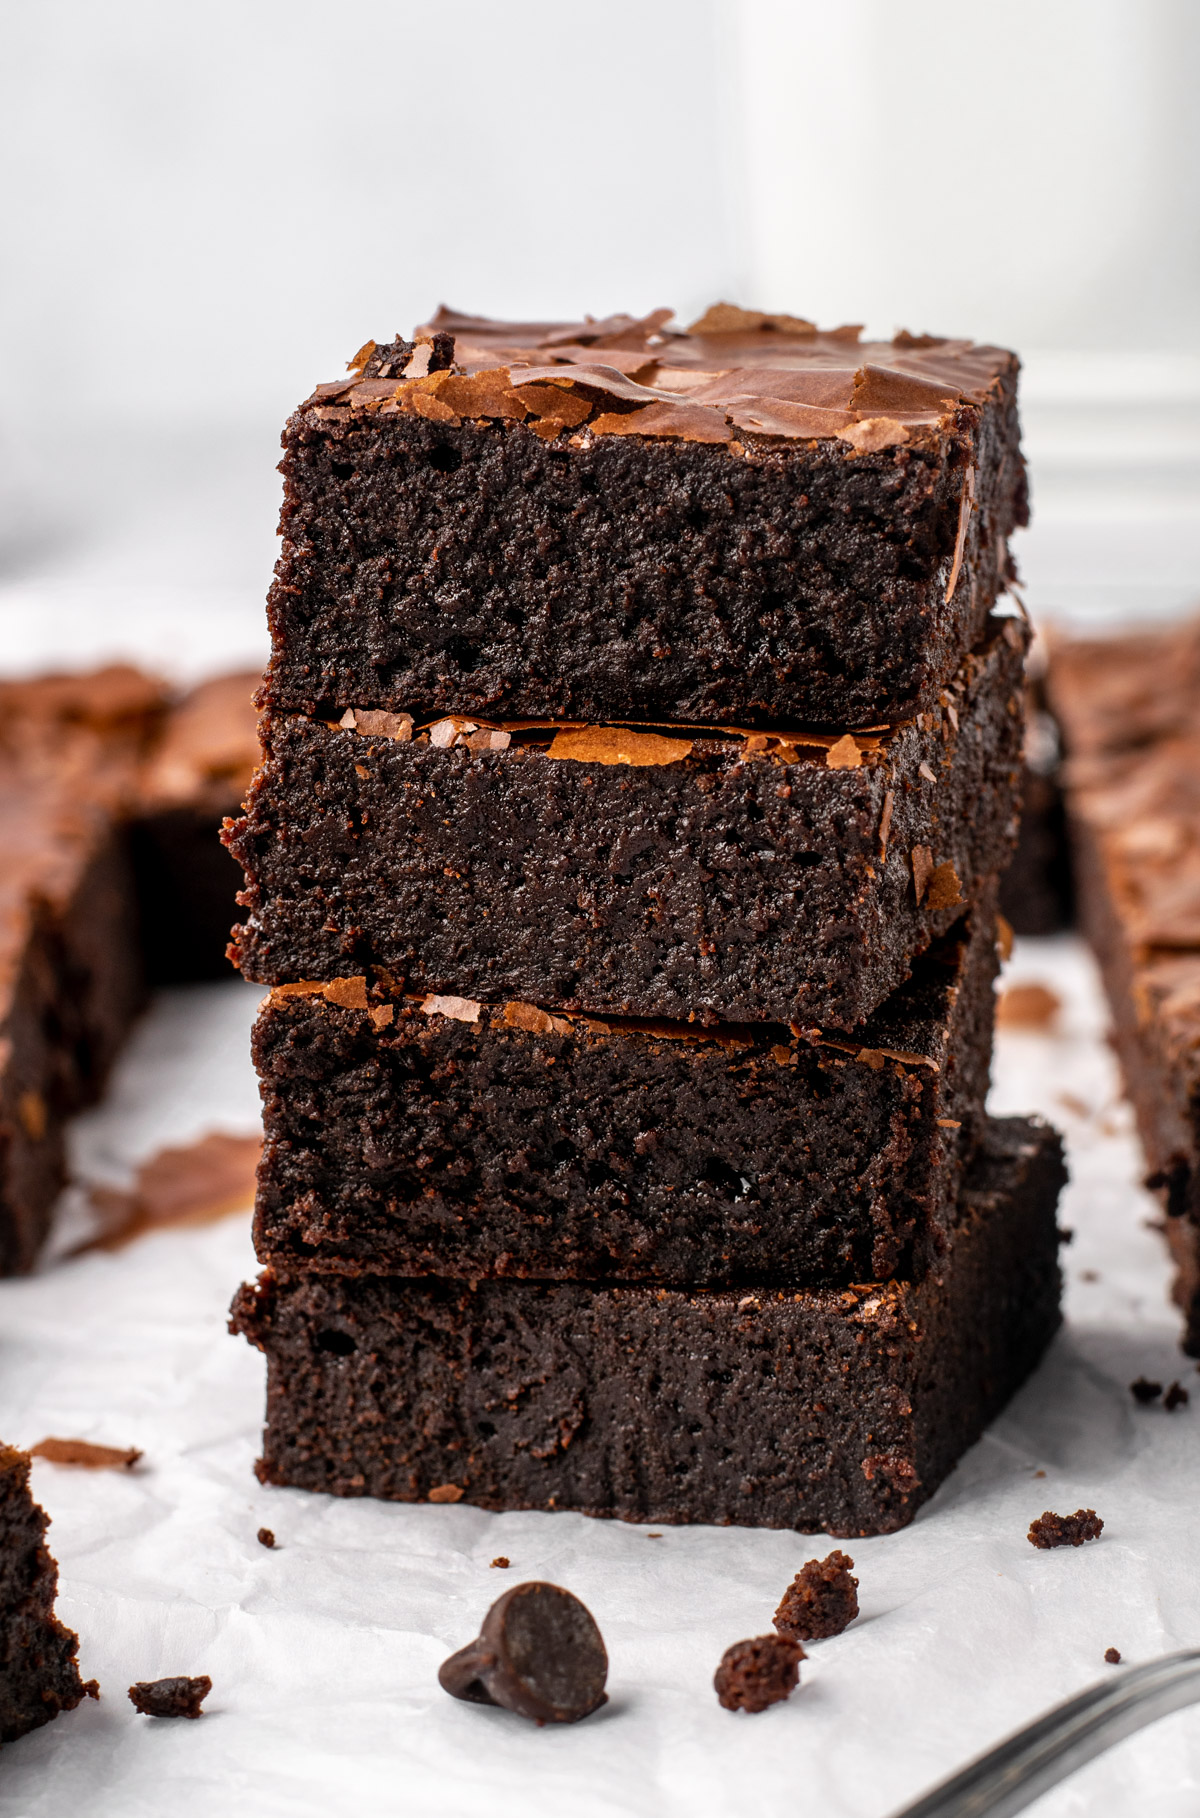
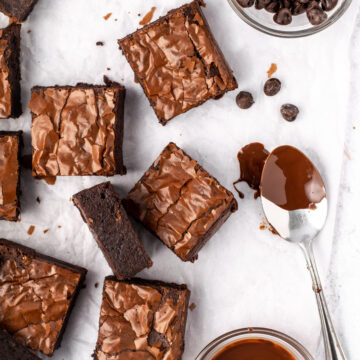
These gluten-free and dairy-free brownies are the ultimate treat! With 2 types of chocolate, a crackly top, and an ultra fudgy centre, these are going to be the best brownies you've ever made.
Fudgy, melt-in-your-mouth brownies are one of my sweet weaknesses. There is quite literally nothing better than a fresh, rich brownie after a meal or with a coffee. And there is nothing worse than a disappointing brownie.
That's why it took me so long to develop this Super Fudgy Gluten-Free and Dairy-Free Brownie recipe. I was not going to stop until it was perfect! Too often I found that brownies were either too gooey, too cakey, too dry, and not up to my standards. I did a lot of testing and learned a lot about brownie science from The Loopy Whisk's gluten-free baking book.
Insert the gluten-free and dairy-free brownie recipe of your dreams. These little babies are smooth, ultra fudgy, super chocolatey, and everything you want a brownie to be—including the elusive shiny top.
You don't need any other brownie recipe now, so what are you waiting for?! Keep reading to find out just how easy it is to make these super fudgy, allergy-friendly brownies without butter or dairy.
Looking for more gluten-free sweets? Check out some of these:
- Gluten-Free Butter Tarts
- Gluten-Free Pumpkin Scones (Starbucks Copycat!)
- Vegan No-Bake Blueberry Cheesecake
- S'mores Brownies
- Dairy-Free Tiramisu Jars
Jump to:
What Makes These Brownies so Fudgy?
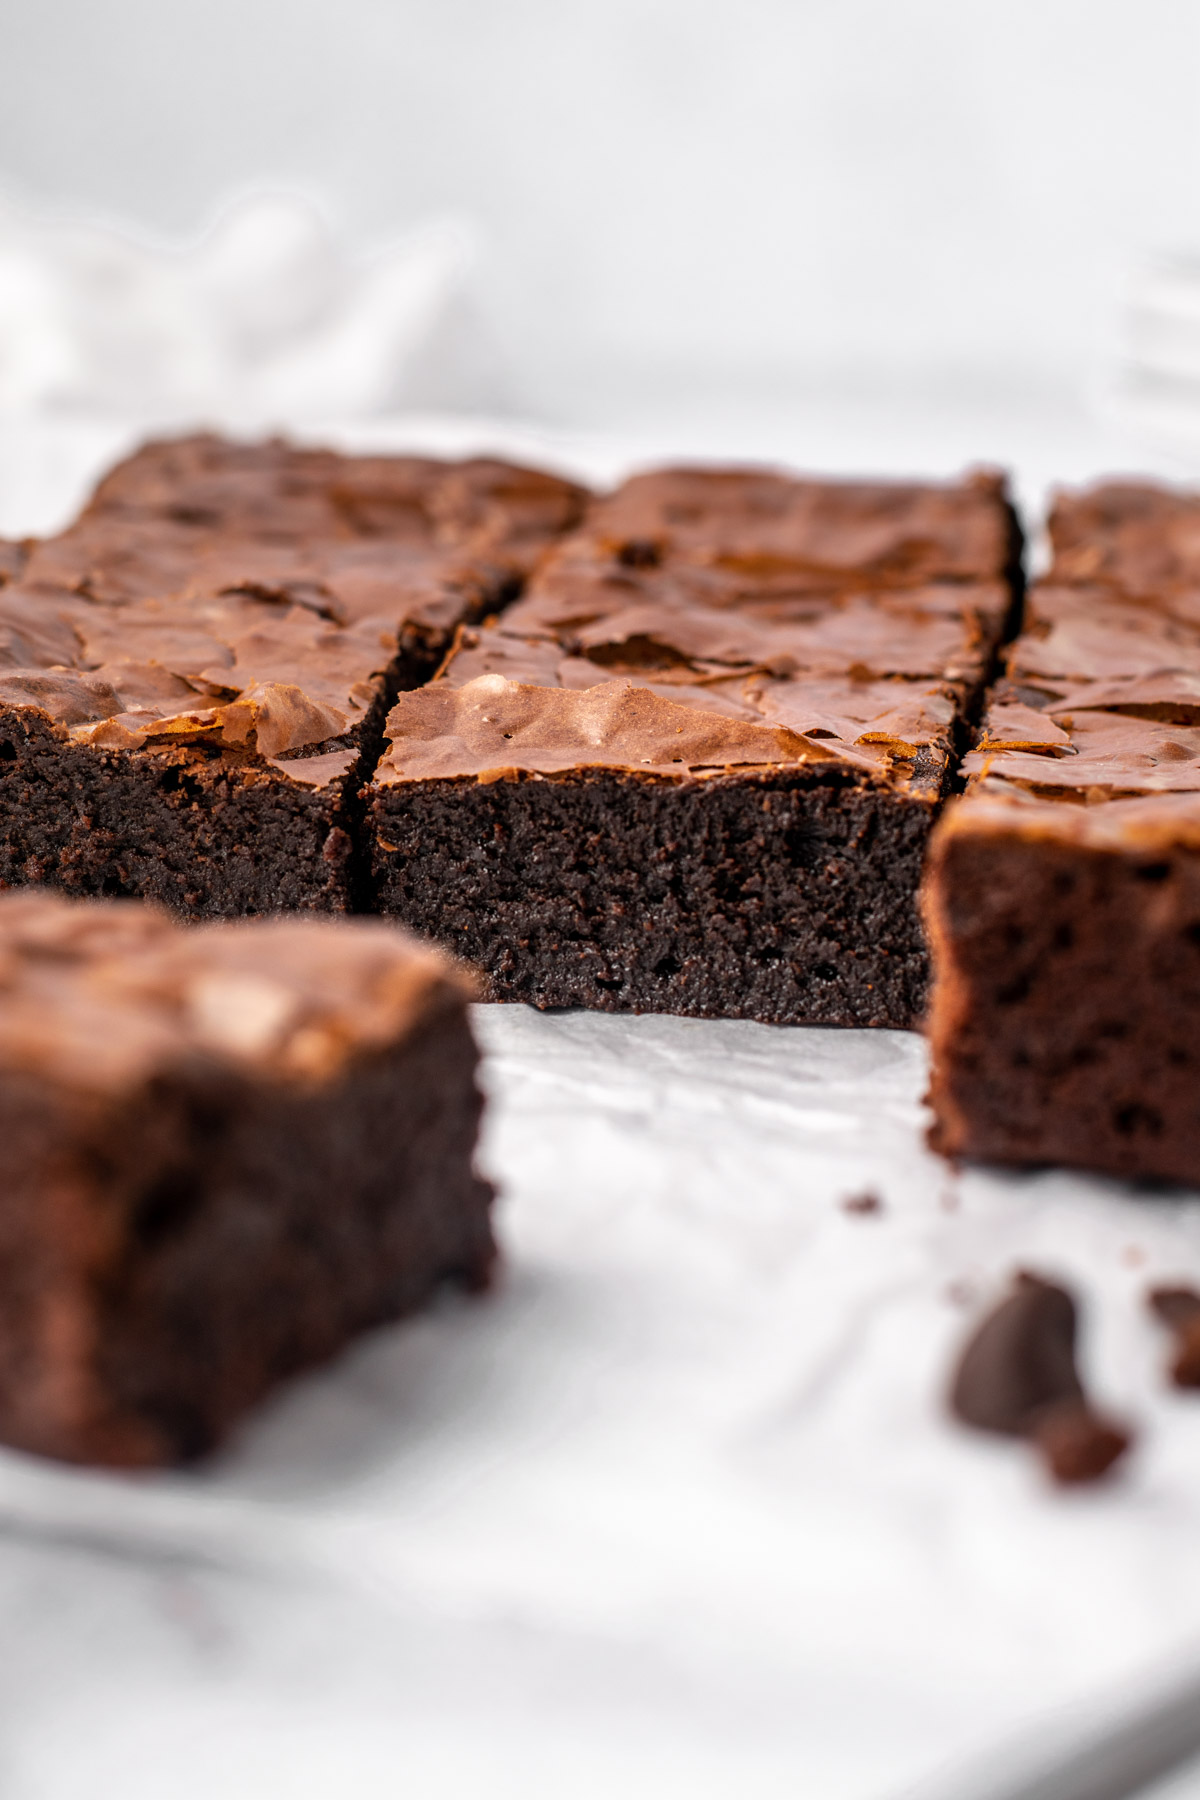
This recipe is (in my opinion) the perfect brownie: moist fudgy centre, chewy edges, shiny top. There's a combination of elements all coming together at once to make that happen, so let's break down the perfect brownie.
- Whisking eggs and sugar for 5 minutes. This allows the sugar to dissolve in the eggs, which when baked, forms the shiny, meringue-like crust.
- Melted chocolate AND (dutch processed) cocoa powder. I'm a big believer in multiple forms of chocolate in a brownie. Melted (dairy-free) chocolate gives the depth of flavour, while dutch processed cocoa powder gives structure to the brownie.
- Minimal gluten-free flour. We want to avoid a dry, cakey brownie at all costs. Because that basically isn't even a brownie anyway. We want fudgy, chewy, and chocolatey, and that requires less flour than you may think.
- Low and slow baking. Slowly drying out the brownies helps to achieve the shiny crust on top while leaving the centre perfectly fudgy.
- Waiting until fully cooled. This one is tough, but important. You must let the brownies cool fully in the pan! Trying to remove them while still warm will result in cracking the brownies. Letting them cool helps to solidify the fudginess. Trust me, it's worth it!

Why You'll Love These Dairy-Free Brownies
- Delicious bakery-style flavour without the allergies. These brownies are gluten, dairy, and nut-free!
- Easy to make. Just mix, bake, and enjoy with only 15 minutes of hands-on time.
- Great for all ages. Who doesn't love a brownie? Serve kids or adults for a crowd pleaser.
- All the elements you want in a brownie. Moist fudgy centre, shiny top, chewy edges, and a mouthful of chocolate flavour.
Ingredients Needed
These gluten-free and dairy-free brownies contain very simple pantry ingredients. Here's what you'll need:
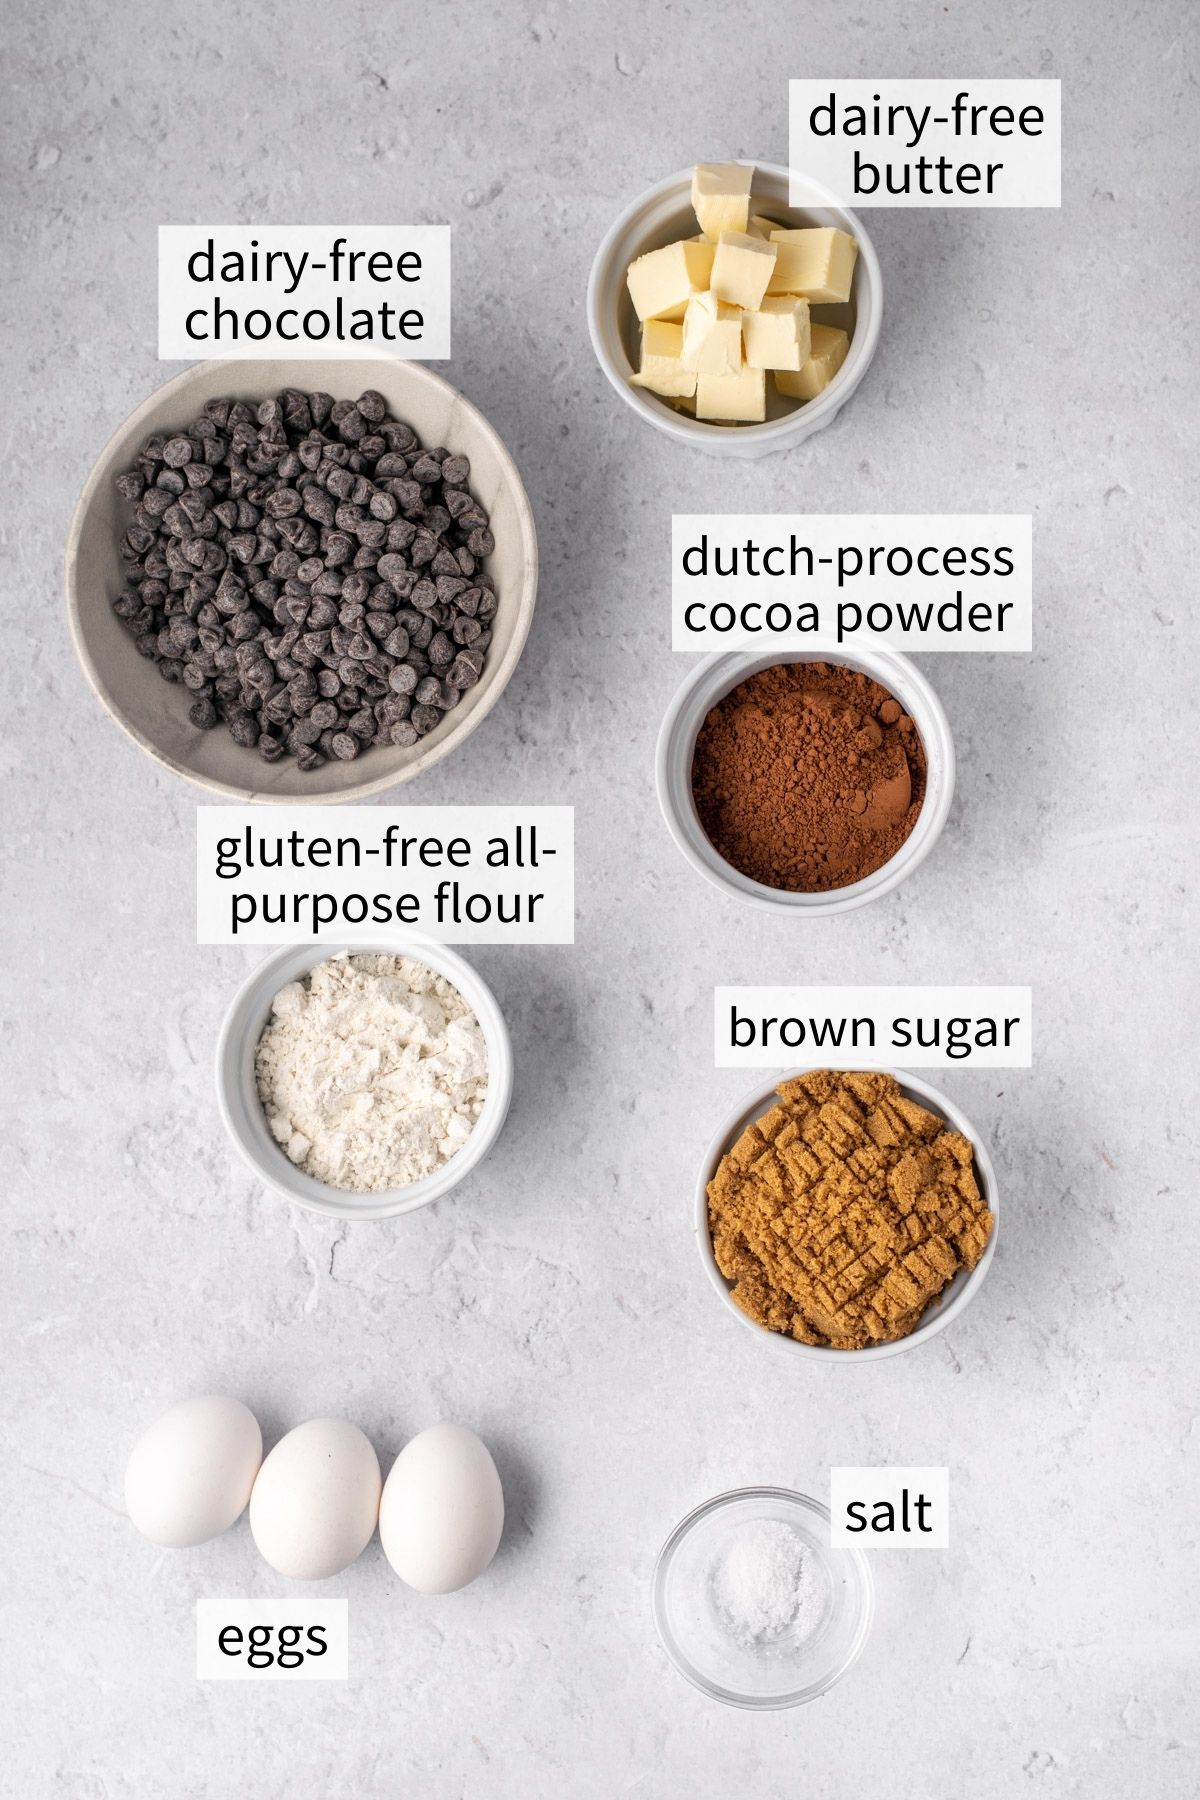
- Dairy-free chocolate chips: Or chunks, or chopped chocolate. Use whatever you prefer, just ensure there are no milk products in it! I love Enjoy Life Foods semisweet chunks or dark chocolate chips.
- Dairy-free salted butter: I generally use a plant-based butter made of oils like Becel. You can also use coconut oil if you prefer.
- Brown sugar: Gives great depth of flavour compared to white sugar, and a bit of moisture too.
- Eggs: I have recently learned how integral eggs are to the fudgy style of brownie that I've been after. Whisked eggs provide the structure for the classic crackly brownie top, and also provide subtle rise to create the ultimate fudgy brownies.
- Gluten-free all-purpose flour with xanthan gum: I use Bob's Red Mill 1:1 Baking Flour (blue bag). If you're not required to be gluten-free, use all-purpose flour.
- Dutch processed cocoa powder: This is my go-to cocoa powder for this recipe because of its deep and neutral chocolatey flavour. You can substitute natural cocoa powder if that's all you have, but it may change the taste slightly, as natural cocoa powder is more acidic than dutch processed. If you want to learn more about the differences in cocoa powders, read this article from Sally's Baking Addiction.
- Salt: Add an extra ¼ teaspoon of salt if using unsalted dairy-free butter or coconut oil.
Step-by-Step Instructions
Be sure to read the recipe card below for the full ingredient list and instructions.
(Prep) Preheat the oven to 325°F. Grease and line an 8"x8" (or 9"x9") square baking pan with parchment paper.
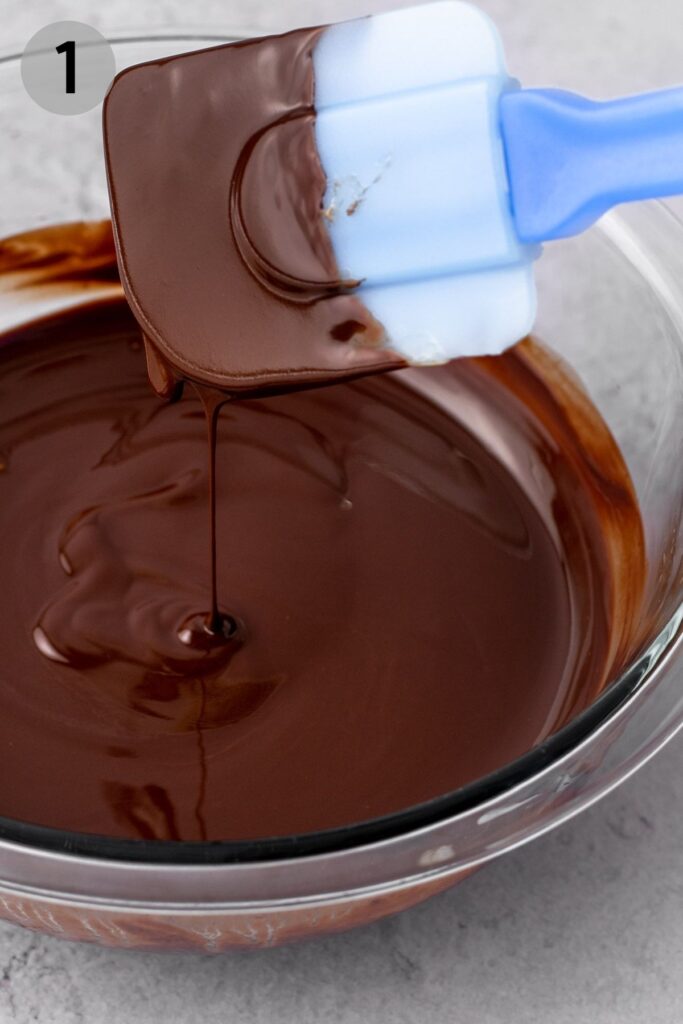
(1) Begin by placing the chocolate chips and dairy-free butter in a microwave safe bowl. Microwave in 30 second intervals until completely smooth and melted, stirring well with a rubber spatula in between. This usually takes me a total of 1 minute 30 seconds. Set aside to cool for a few minutes.
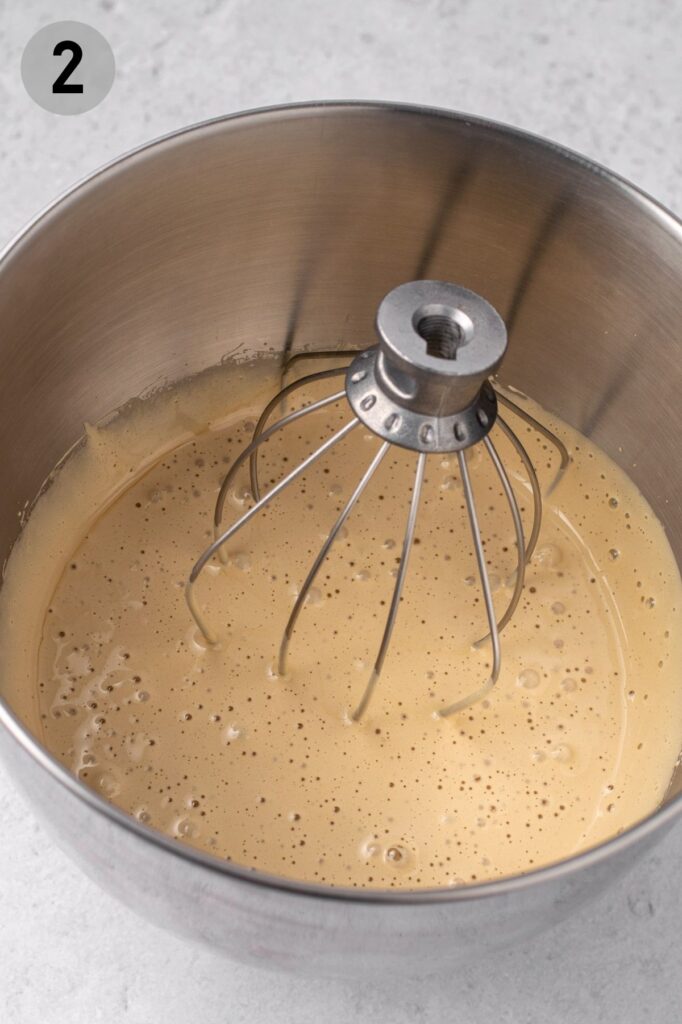
(2) Place the brown sugar and all 3 eggs in the bowl of a stand mixer (or a large bowl with a hand mixer). Use the whisk attachment to beat on medium-high for 4-5 minutes until light and bubbly. Stop and scrape down the sides of the bowl occasionally with a rubber spatula.
(3) Pour the melted chocolate mixture into the sugar and egg bowl. Whisk on medium speed for 1-2 minutes to fully incorporate the chocolate. Stop and use a rubber spatula to scrape the bottom and sides.
Add the flour, cocoa powder, and salt to the bowl. Fold with the rubber spatula until you have a homogenous batter.
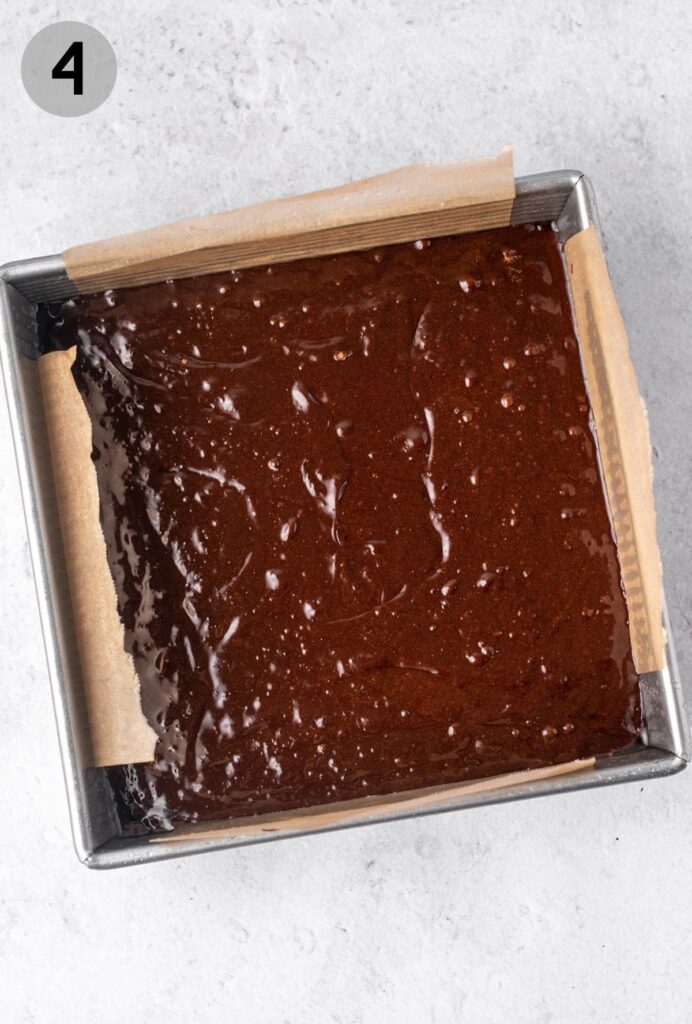
(4) Pour the brownie batter into the square pan, smoothing the top with the spatula and tapping the pan against the counter to remove any air bubbles.

Bake for 35-37 minutes (8"x8" pan). If using a 9"x9" pan, begin to check the brownies around 30 minutes. Insert a toothpick into the centre of the brownie pan to check for doneness. There should be a few moist crumbs attached when removed. If you see gooey wet batter, leave them in the oven and check again in 2-3 minutes.
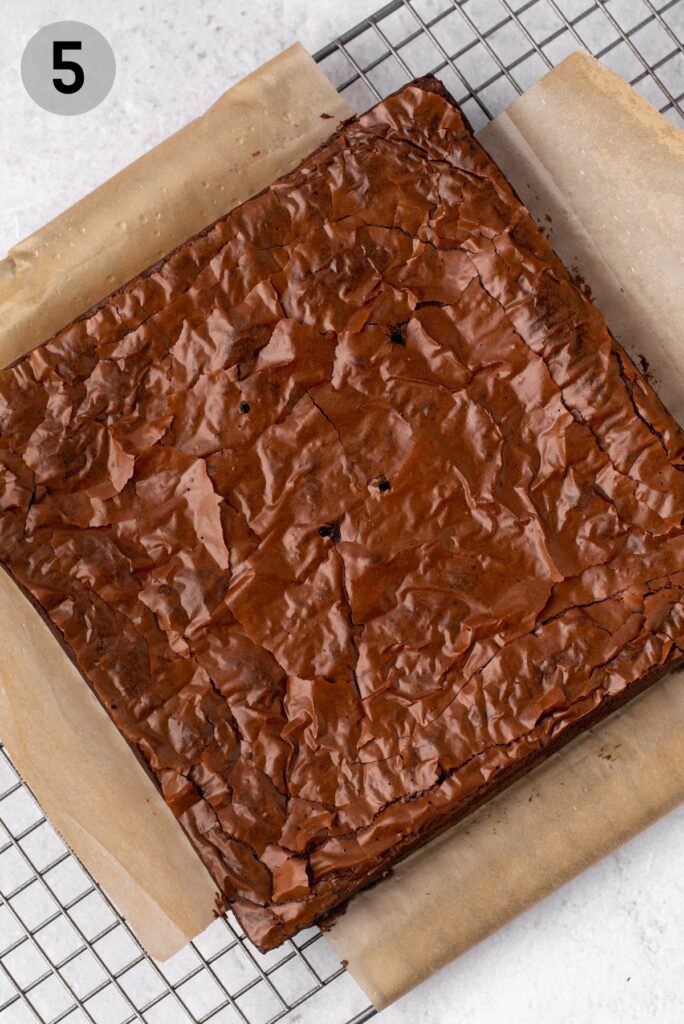
(5) Once done, remove the pan from the oven and allow brownies to cool completely in the pan. They will be too difficult to remove from the pan when hot. After about 2 hours, remove brownies from the pan by gently lifting the parchment paper.
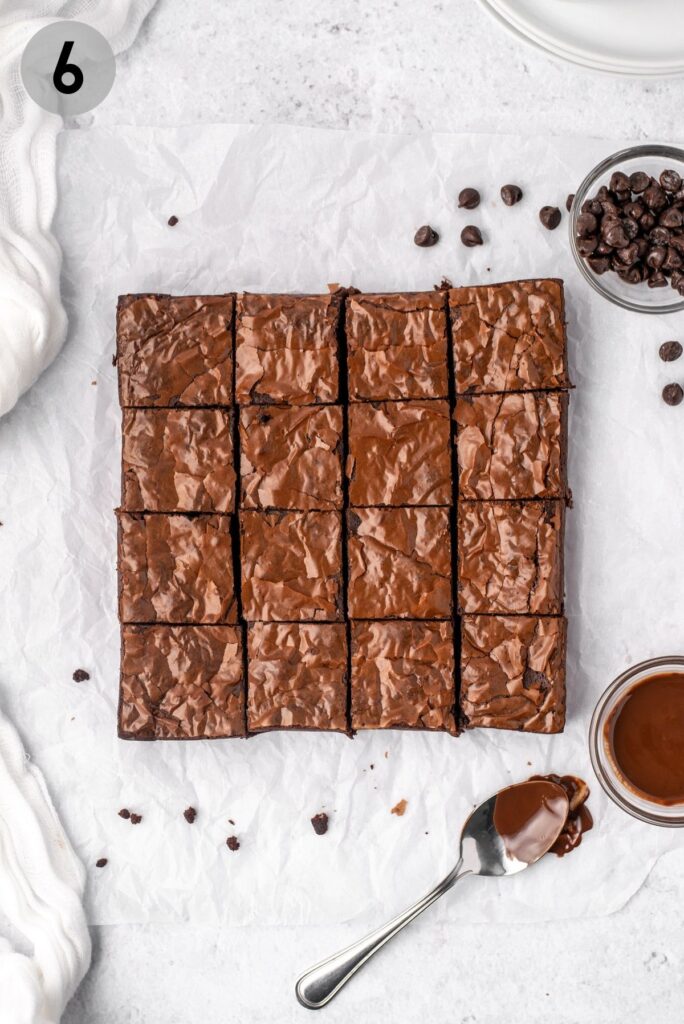
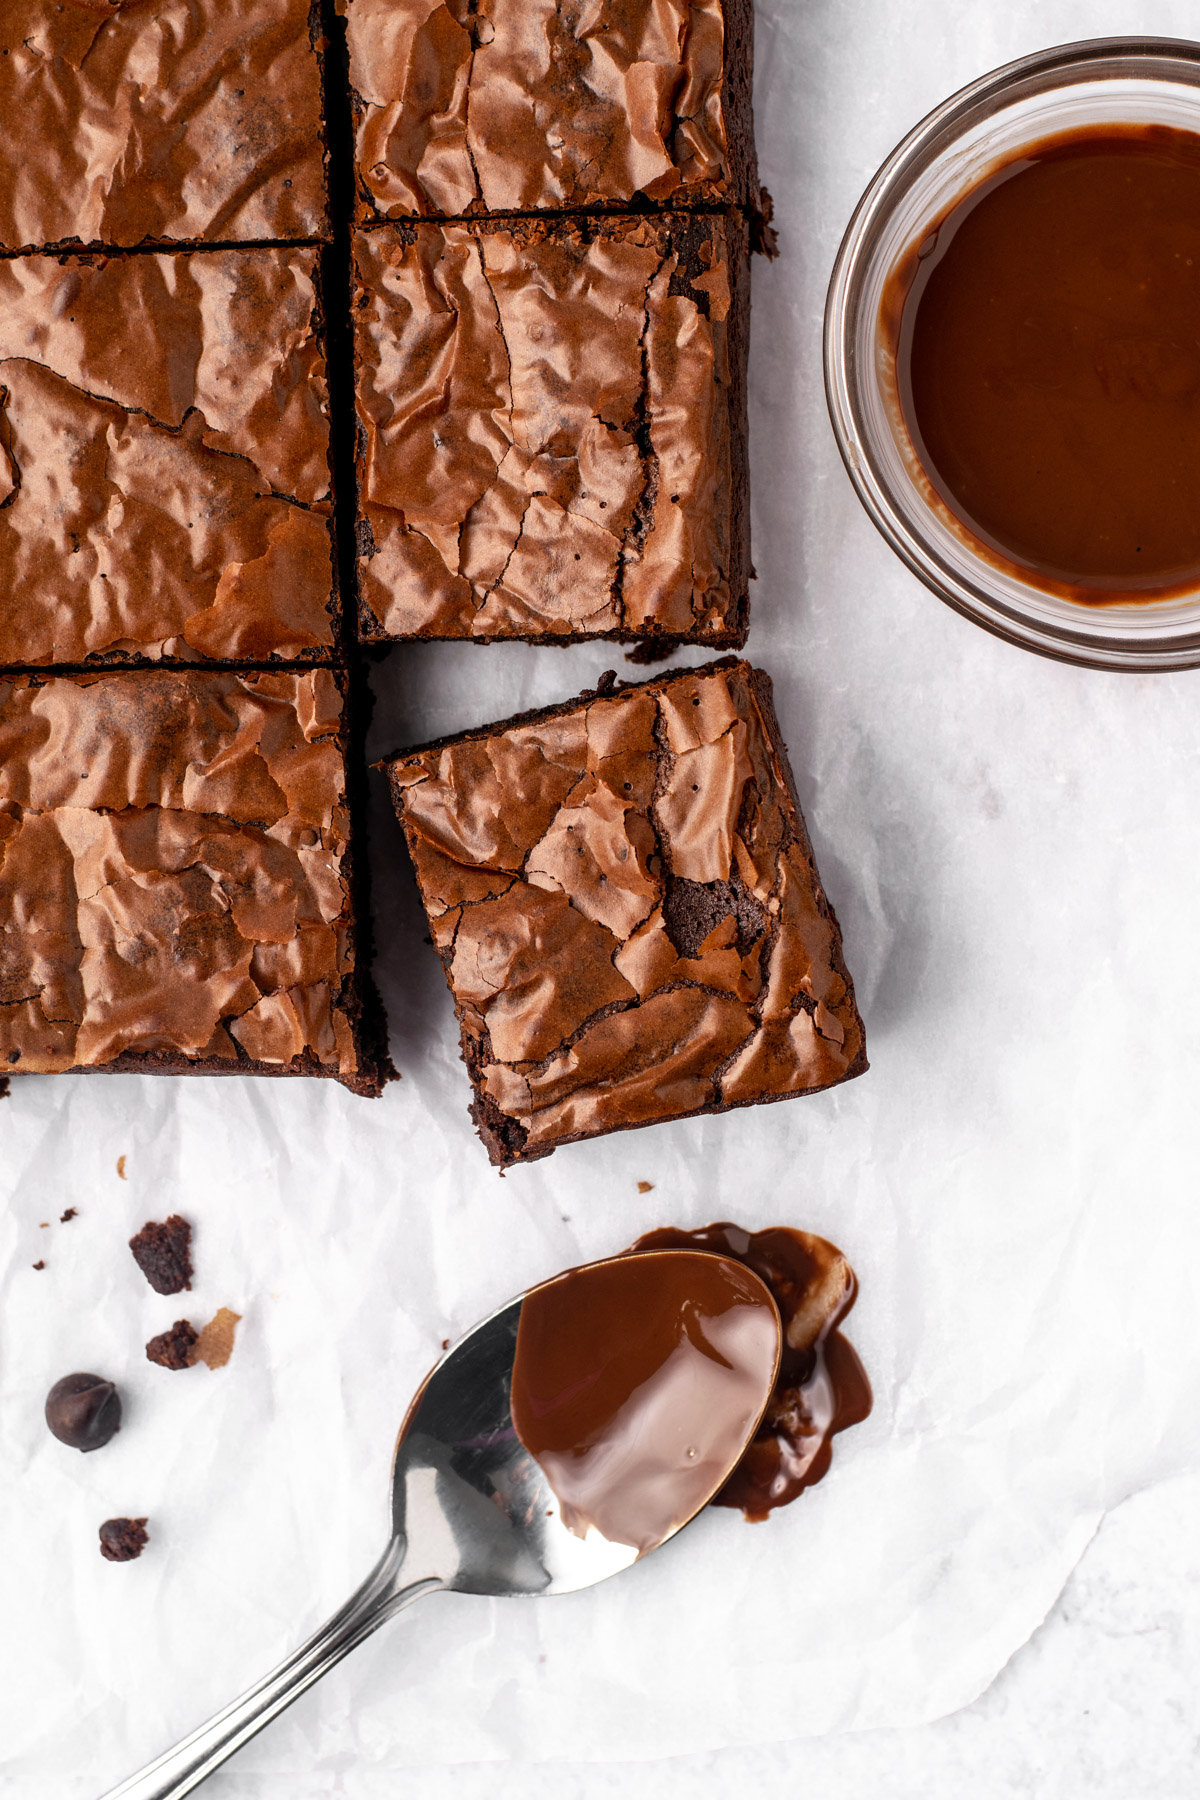
(6) To achieve clean brownie cuts, run a large metal knife under hot water for 1 minute. Dry the knife and make a slice. Repeat, cleaning and heating the knife after each cut, until you have 16 perfect brownies. Enjoy!
Storage Instructions
Dairy-free brownies will keep in an airtight container at room temperature for 4-5 days. While they could be frozen, it is not recommended since freezing and thawing may ruin the distinct crackly top of the brownies.
Customizations
While these brownies are the ultimate treat on their own, there are so many ways you can jazz them up. Try some of these additions:
- Chocolate chips in the batter.
- Chopped nuts (pecans, walnuts, hazelnuts).
- Drizzle with icing, ganache, or chocolate hazelnut spread.
- Get creative!
Expert Tips
Here are some of my top tips and tricks for successful gluten-free and dairy-free brownies:
- Bring all ingredients to room temperature before beginning. This will allow the sugar to dissolve easier in the eggs.
- Whip it real good! Seriously, you need to whip the sugar and eggs for a good 5 minutes.
- Allow the melted chocolate and dairy-free butter to cool slightly. Pouring screaming hot chocolate into eggs may result in scrambling, and that is not what we're after here.
- Fold the dry ingredients in lightly to avoid over-mixing.
- Grease and line the baking pan with parchment paper. There's nothing worse than stuck brownies you can't eat.
- Use the toothpick test to check doneness. When a toothpick is inserted into the centre of the pan and comes out with some moist crumbs attached, they are perfectly done. The toothpick will not be perfectly clean like a cake. If it comes out with wet batter, check again in 2-3 minutes.
- Allow brownies to cool completely in the pan. The brownies will be too delicate to remove when hot or even warm. Allow to cool for at least 2 hours in the pan for brownies to set.
- Run a sharp knife under hot water before each slice. Be sure to dry the knife, slice, then clean off any brownie bits before running under water and making another slice for the cleanest cuts.
Frequently Asked Questions
While many boxed brownie mixes may not contain dairy in the dry ingredients, they may call for melted butter. In this case, simply substitute a neutral flavoured oil like avocado or refined coconut oil—or vegan butter. Be sure to read the ingredients in the dry mix though!
For this fudgy brownie recipe, the eggs and sugar need to be whisked for 5 minutes. If you don't have a stand mixer, you can use a handheld mixer with beaters. If you don't have an electric mixer, use a large whisk to whisk the sugar and eggs for up to 5 minutes if you can. You may not incorporate as much air, resulting a lesser or absent shiny crust, but you will still have delicious brownies!
I like to use semisweet chocolate chunks from Enjoy Life Foods, or Kirkland brand chocolate chips (they don't contain dairy ingredients). You can also use 60-70% dark chocolate, chopped, if you prefer (ensure no dairy ingredients).
The reason I recommend using dutch processed cocoa powder is because the dutch processing washes the cocoa beans, resulting in a neutral pH. Natural cocoa beans, and therefore cocoa powder, have a slightly acidic pH. This may potentially rub off in the taste of the brownies, but for this recipe, you should still have delicious fudgy brownies made with natural cocoa powder.
While some may like gooey brownies, there is a fine line between gooey and undercooked. If your toothpick test comes out with wet batter, the brownies are not done yet. These brownies are done when the toothpick comes out with many moist crumbs attached. (It will not come out clean like a cake).
To achieve clean brownie cuts, run a large metal knife under hot water for 1 minute. Dry the knife and make a slice. Repeat, cleaning and heating the knife after each cut, until you have 16 perfect brownies.
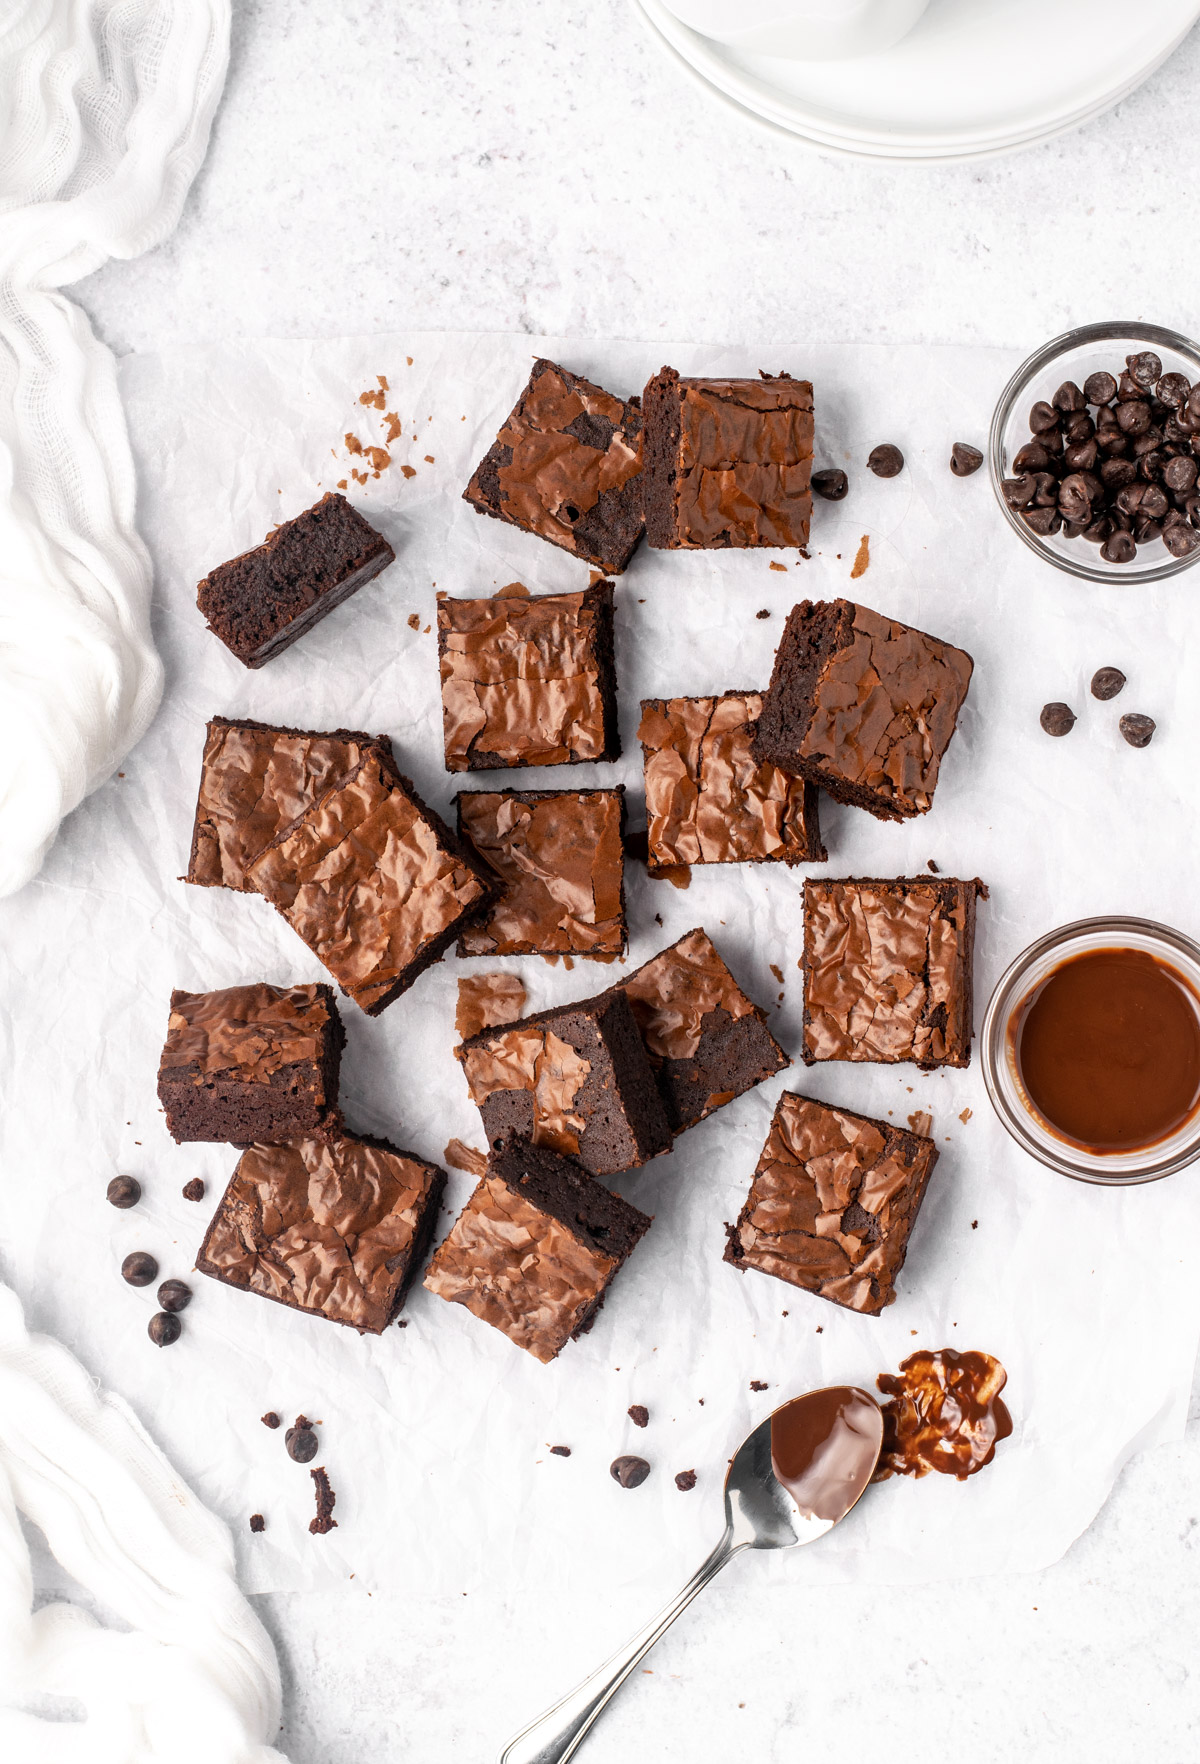
These gluten-free and dairy-free brownies are the ultimate fudgy brownie recipe. With a fudgy interior, shiny top, chewy edges, and intense chocolate flavour, these brownies are sure to be a regular in your dessert rotation.
Have you made these gluten-free and dairy-free brownies? Be sure to leave a comment telling me how much you loved them, and tag me on instagram @fromoliviaskitchen. I hope you enjoy as much as I do!
More Desserts You'll Love


Recipe
Dairy-Free Fudgy Brownies
Equipment
- 8"x8" or 9"x9" baking pan
- Stand mixer or hand mixer
Ingredients
- 1⅓ cups dairy-free chocolate chips semisweet or 60-70% dark
- ½ cup dairy-free salted butter can sub coconut oil
- 1 cup packed brown sugar
- 3 eggs
- ½ cup gluten-free all-purpose flour with xanthan gum I use Bob's Red Mill 1:1 Baking Flour (blue bag)
- ⅓ cup dutch process cocoa powder can sub natural cocoa powder, but may change the taste slightly
- ¼ teaspoon salt add an extra ¼ teaspoon salt if using unsalted dairy-free butter or coconut oil
Instructions
- Preheat the oven to 325°F. Grease and line an 8"x8" (or 9"x9") square baking pan with parchment paper.
- Begin by placing the chocolate chips and dairy-free butter in a microwave safe bowl. Microwave in 30 second intervals until completely smooth and melted, stirring well with a rubber spatula in between. This usually takes me a total of 1 minute 30 seconds. Set aside to cool for a few minutes.
- Place the brown sugar and all 3 eggs in the bowl of a stand mixer (or a large bowl with a hand mixer). Use the whisk attachment to beat on medium-high for 4-5 minutes until light and bubbly. Stop and scrape down the sides of the bowl occasionally with a rubber spatula.
- Pour the melted chocolate mixture into the sugar and egg bowl. Whisk on medium speed for 1-2 minutes to fully incorporate the chocolate. Stop and use a rubber spatula to scrape the bottom and sides.
- Add the flour, cocoa powder, and salt to the bowl. Fold with the rubber spatula until you have a homogenous batter. Pour the brownie batter into the square pan, smoothing the top with the spatula and tapping the pan against the counter to remove any air bubbles.
- Bake for 35-37 minutes (8"x8" pan). If using a 9"x9" pan, begin to check the brownies around 30 minutes. Insert a toothpick into the centre of the brownie pan to check for doneness. There should be a few moist crumbs attached when removed. If you see gooey wet batter, leave them in the oven and check again in 2-3 minutes.
- Once done, remove the pan from the oven and allow brownies to cool completely in the pan. They will be too difficult to remove from the pan when hot. After about 2 hours, remove brownies from the pan by gently lifting the parchment paper. To achieve clean brownie cuts, run a large metal knife under hot water for 1 minute. Dry the knife and make a slice. Repeat, cleaning and heating the knife after each cut, until you have 16 perfect brownies. Enjoy!
Jessie says
These are so yummy! I’ve made them a few times for my gluten & dairy free coworker and she loves them 🙂